Applying scaling to print parts
About scale groups
Scale groups are sets of print drawing parts to which a common scale factor is applied. The use of scale groups guarantees that the drawings appear in proportion to each other when printed out or seen on the screen. The functionality is especially helpful for printing and viewing 1ups, layout drawings or 3D models of the parts of displays, where some parts are much larger than others and would appear out of proportion on-screen or on paper if each part uses its own scale factor. Applying universal scaling for parts that belong to structures made up of multiple variously sized parts guarantees that all these parts appear in proportion to one another, both on the screen and on paper.
To apply identical scaling to print parts
NOTE: The procedure that follows focuses on how to apply identical scaling to a print part. All other potential settings in the dialog box that you can apply to a print part are ignored.
- Do any of the following:
- Double-click the print part that you want to add to the scaled group.
- Right-click the print part, and then click Object Properties.
The Setup Print Frame dialog box appears.

- In the Name Mapping area, select the drawing to which you will be applying scaling.
- In Scale Group, select the scaling techniques that you
want to apply to the print part:
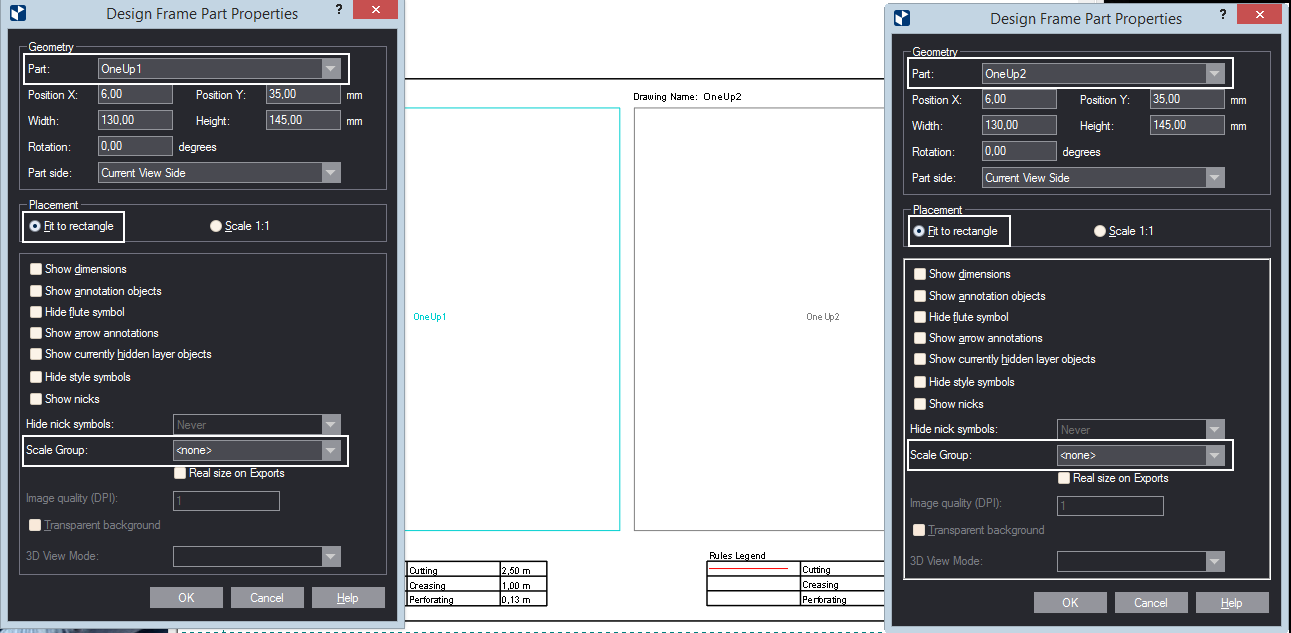
- None. The print part will be visualized in accordance with the property of the area predefined in the design frame: if the Fit to rectangle option sis selected, the part wil receive scaling that will allow it to fill the rectangular area; (2) Scale 1:1 the print part will be vizualized in its actual size, without any scaling.
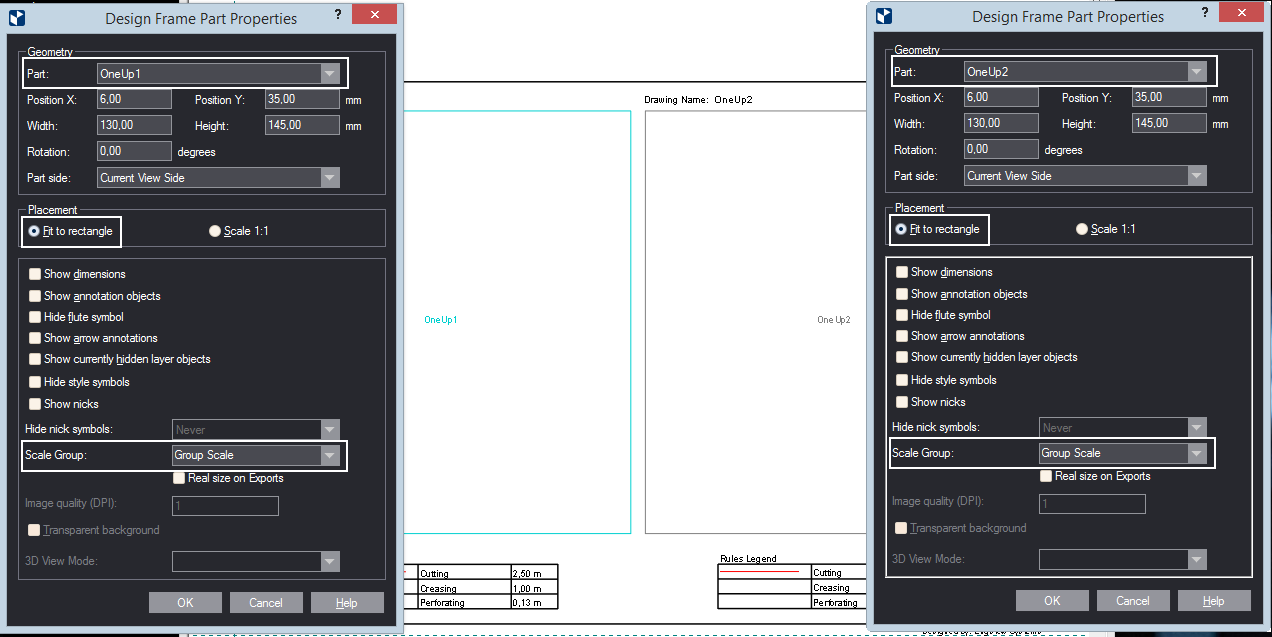
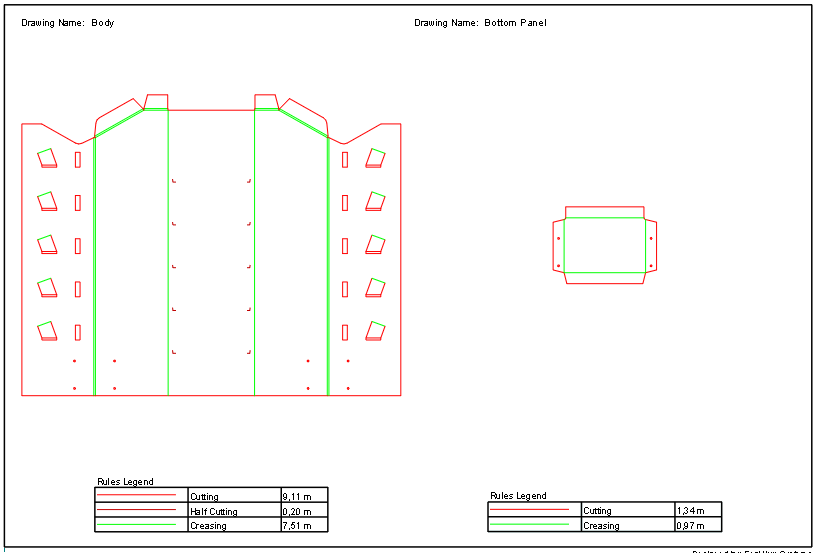
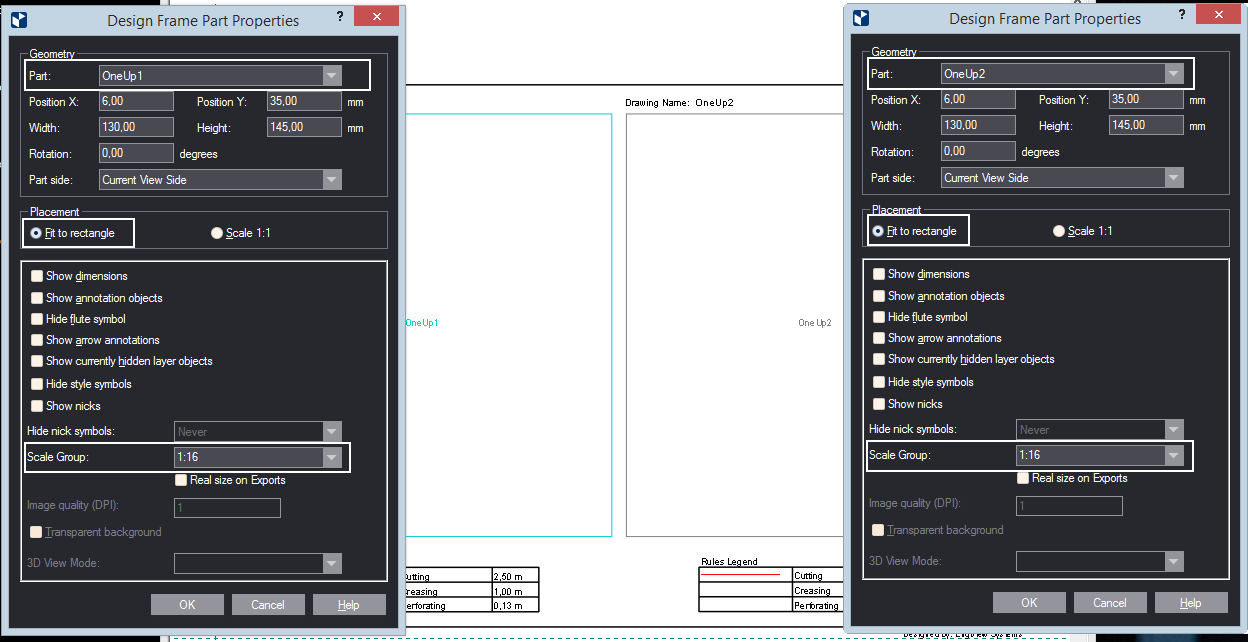
- To apply an identical scaling to a group of print parts. Type a name for a group — for example, Group 1, Scale Group, or other. Then set the same scale group to the rest of the print parts that you want to scale with the same scaling. The parts will be scaled with the scale factor for the largest part in the group. The benefit here is that all the parts will be proportional to one another.
- Display in specific scaling. To apply a specific scaling to a print part, type it — for example, 1:15, 1:10, 2:5. This will scale the print part accordingly.
- Repeat Steps 2 and 3 for all the print parts to which you want to apply scaling.
Consider the examples below to learn more about how the three approaches work.
Examples
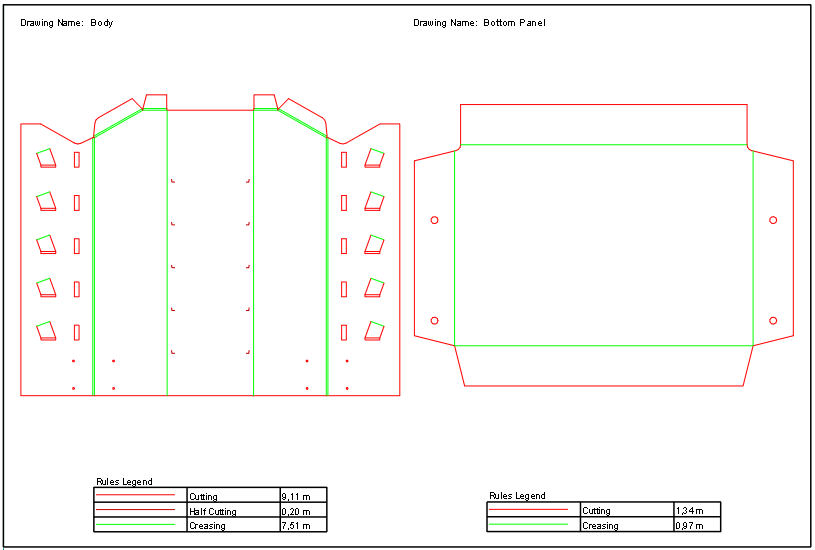
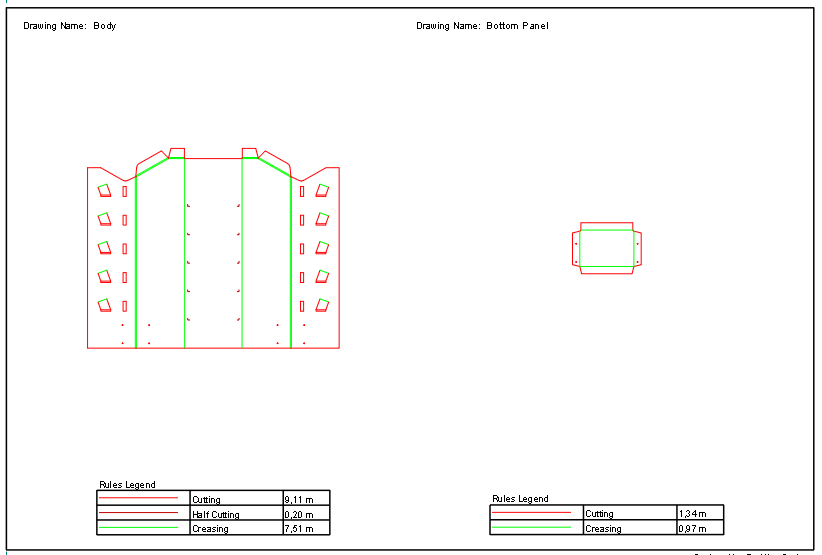
A design frame has three rectangular areas with the Fit to rectangle option. When the design frame is used as the basis of a print drawing, if the three areas are not grouped, EngView will compute three different scale factors for each of them — for example, 0.2, 0.6 and 0.8 — to make the respective drawings would fit in the rectangular areas. Because the parts have different overall dimensions, different scale factors will be computed for them when they are fitted into the rectangular areas.
Using grouped scaling
This default behavior will cause the drawings to appear out of any proportion to each other. So for drawings that belong to the same complex structure — for example, a display or a body-and-lid box — it is best to put the three areas in a scale group and use the largest computed scaling among the three areas — in this case, 0.2. This ensures that all the drawings will appear in proportion to each other, thus giving a realistic idea of how the parts stay together.
Using explicit scaling
Apart from scaling drawings in a common group, you can set an explicit scaling ratio and apply it to a print part.
Consider the difference between scaling parts without scaling (Case 1), after applying a scale group (Case 2), and with a concrete scaling ratio (Case 3).