Generating print files from layouts in Illustrator
You can create print files from layouts
in Illustrator. In the layout, the integration places artworks in
the same way as they appear on the 1up.
To generate print files from Illustrator-opened
structural files
Preparing the layout file
- With your structural file opened in Illustrator, click Edit
in Package Designer
 in the upper
right corner on any integration panel.
in the upper
right corner on any integration panel.
EngView starts and opens the file.
- In EngView, create the
layout you need.
- After you have created the layout, close it.
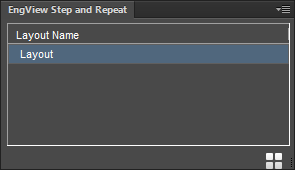
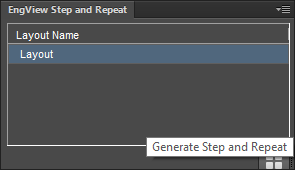
Back in Illustrator, a row has appeared in
the EngView Step and Repeat panel. This is the file or layer
that you use for generating print-ready files.
- In the EngView Step and Repeat panel, select the layout
row.
Generating the print-ready files
When generating print-ready files, the integration creates two Illustrator
files — one for the front side and one for the rear side. The example
below walks you through one such scenario.
Creating layout from Illustrator-opened structural
designs
The use case follows a basic scenario of how the Illustrator/EngView
integration generates files for printing from a resizable structure
fitted with articles. As a final result, the scenario generates two
files: one for the front side, and one for the rear side.
In the scenario, the integration uses bleed set in EngView.
- With the structure open in Illustrator, switch to editing in
EngView.

- In EngView, create the layout and apply the articles you want
to the parts.
- Save the file and close it.
- In the message that asks you whether you want to save the changes,
click Yes.
EngView takes you back to Illustrator, where
a row has appeared in the EngView Step and Repeat panel, indicating
the existent layout.
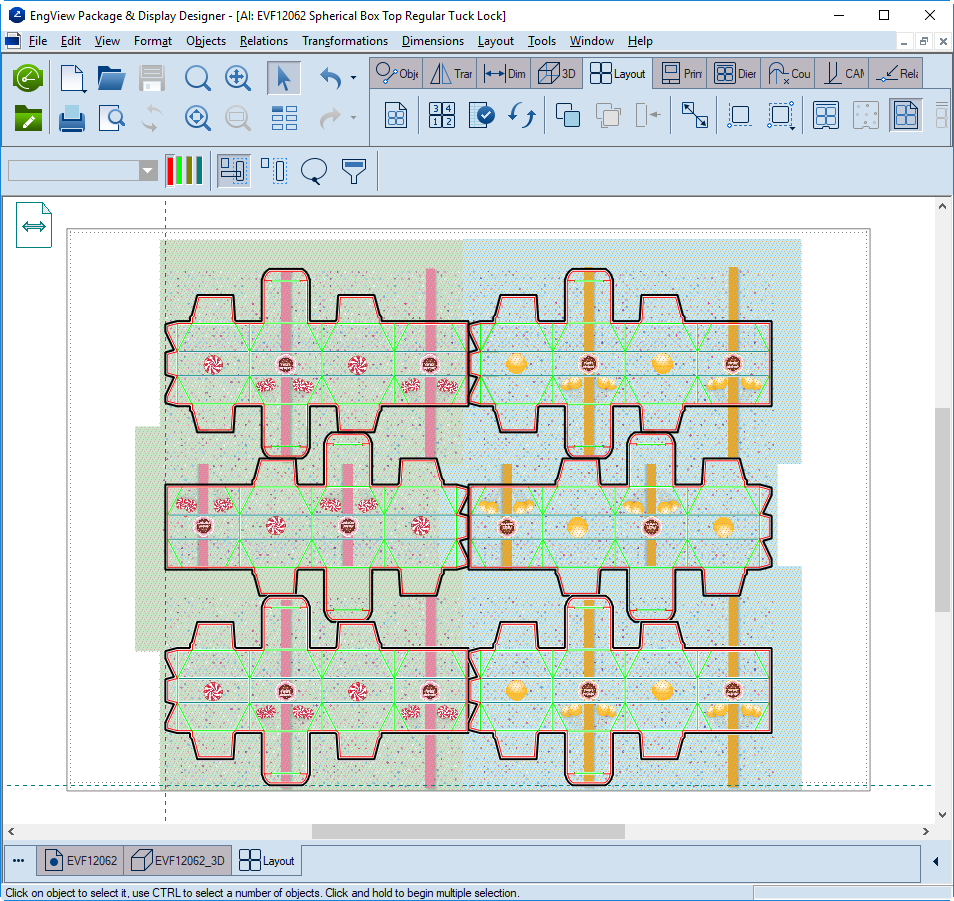
We now move to generate the layout. We generate
the front side and rear side one by one.
- In the Step and Repeat tab, click generate the Step and Repeat
button.
The Generate Step and Repeat dialog box appears.
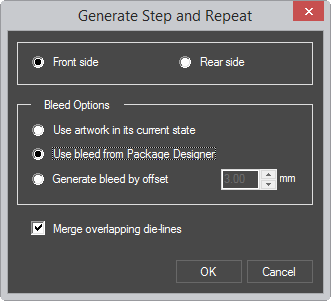
| Side |
Indicates the side (Front or Rear) that integration will
use for creating the layout. |
| |
| Bleed Options |
Options about the application of the bleed |
| Use artwork in its current state |
Use bleed that you create in Illustrator. If you have added
the bleed using Illustrator, the integration will use it for
printing the file. |
| Use bleed from Package Designer |
Use the bleed that you create in the 1up in Package Designer. |
| Generate bleed by offset |
Generate bleed in Illustrator by setting a specific offset.
Here you enter an offset value for the bleed that the integration
will later apply for generating the print-ready files. The offset value must be greater than 0. |
| |
| Merge overlapping die-lines |
Select to merge overlapping objects that indicate die-lines
and are in the same style. As a result, the merged object
will then be processed by a single pass of the cutting instrument. |
The bleed application method must then be selected.
In this case, we use the bleed generated in EngView.
- To generate a layout for the front side, select the Front Side
option. To use the bleed as defined in EngView, select the Use
Bleed by Package Designer option.
- Click OK.
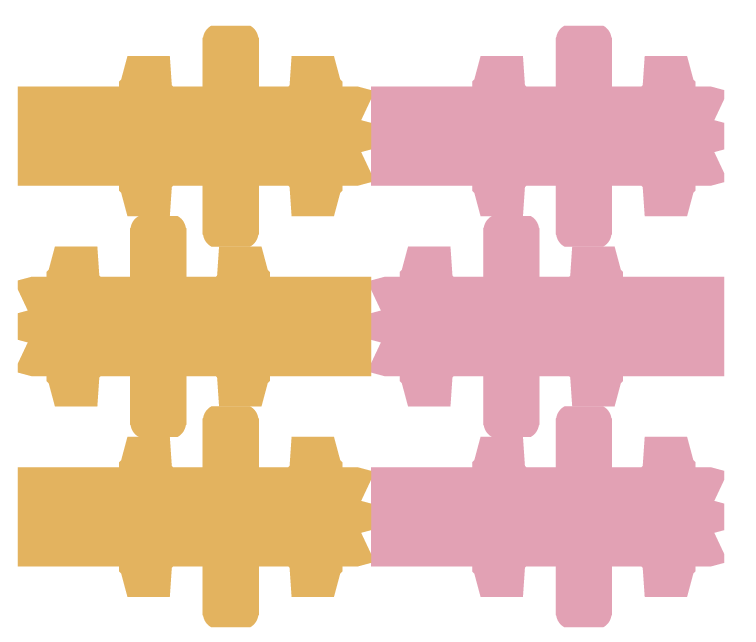
The integration creates a new Illustrator file
for the front side that features two layers: die lines and Artwork
(pictured).

We then proceed by generating the rear side
layout.
- In the Step and Repeat tab, click again the Step and Repeat
button.
The Generate Step and Repeat dialog box appears.
- Select the Rear Side option.
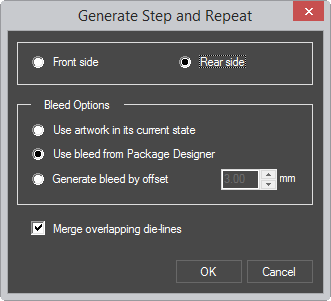
The integration creates a second Illustrator
file for the rear side that features two layers: die lines and
Artwork (pictured).