Inserting individual 1ups into open projects
When working on a project, you can insert individual 1up from existing .evd or .evr files.
The functionality lets you insert only 1up drawings: you cannot use it to insert non-1up drawings such as layouts, 3D, bridges, counterplates, CAM, or other types of drawings.
To insert external 1ups into a project
- With your project open, on the File menu, click Insert 1ups.
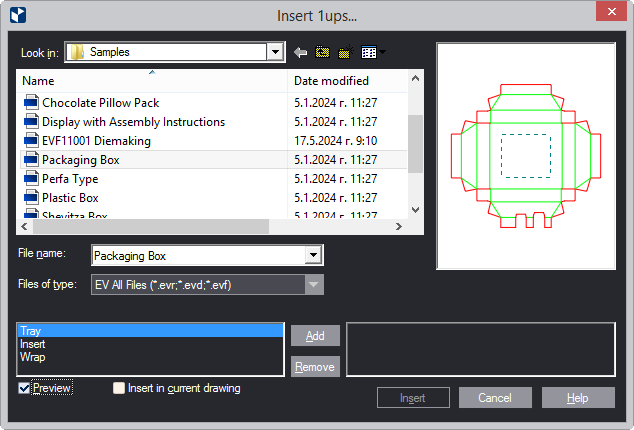
The Insert 1ups dialog box appears.

- In Look In, navigate to the directory where the source file is.
- Select the .evr or .evd file that you want to insert.
- In the list of source file drawings, select the 1ups that you want to insert, and then click Add.
- (Optional) To see a preview of the 1up in the right-hand preview area, select the Preview check box.
For each drawing that you add, the Name in Destination File dialog box appears, in which you type the name that the drawing will have when it becomes part of the destination project.

- In Drawing Name, type the name that the drawing will be have in the destination file, and then click OK.
The selected drawing appears in the lower right area. The drawing is now ready to go into the project.
- To insert the drawings, click Insert.
TIP: You can insert 1ups directly into the active drawing rather than as a separate drawing. To do this, select the Insert in current drawing check box. As a result, when you click Insert, all the 1ups selected for inserting will go into the current drawing. This means that if you want to insert two groups of 1ups — one directly and another as separate 1ups — you will have to perform two separate insert operations.
top of page