Starting a project from a ready-to-use resizable template
This page walks you through a procedure of how to start a packaging design project from a ready to use resizable template in the EngView Librar of Parametric Templates. For more details about how to use templates for creating packaging, as well as how to understands the connection between parameters and dimensions,
see this special section.
To start a project from a ready-to-use resizable
template
- Do one of the following:
- Click New project
 .
.
- On the File menu, click New.
- Press CTRL+N.
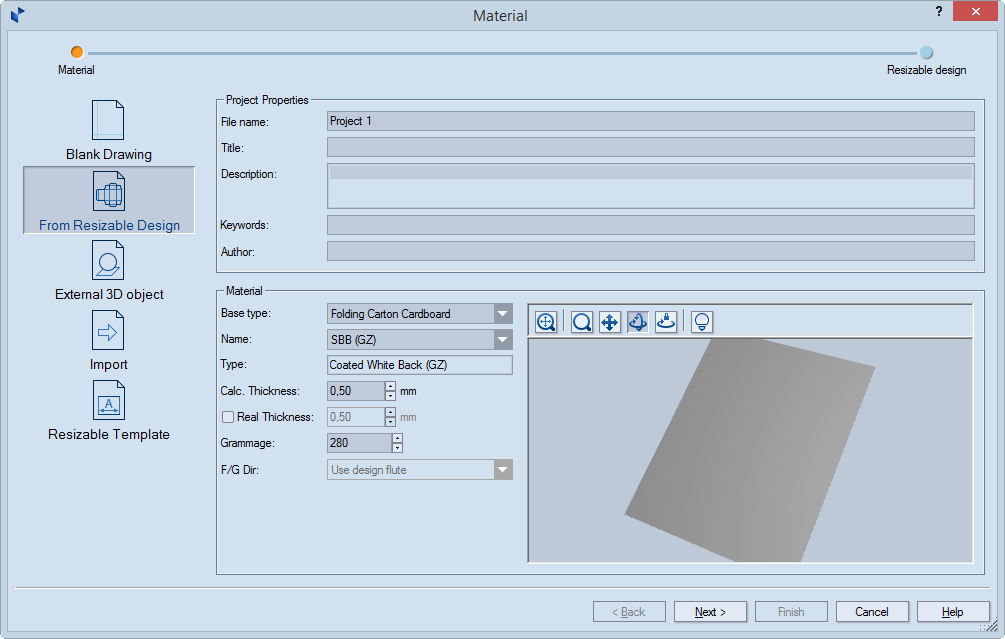
- In the Material dialog box that appears, click From
Resizable Design.
Тhe wizard for
selection of a design opens at the Material page. In it, you
enter general information about the project and set the project's
constructional properties.
- Under Project Properties, type general information for
the project: name of the .evd file; title for the project; general
description of what the project is about; relevant keywords; and
the name of who created the project.
- Under Material, in Base type select the base
type of the material.
NOTE: The library of base types follows a tree-like
structure, and as you browse deeper into it and select a type, in
Name the program displays only the types that fall within the
selected type group. For example, click the Base type drop-down
list, select Folding Carton Cardboard, and then select White
Lined Chipboard (WLC). When you later start browsing in Name,
you will be browsing only the materials grouped under the WLC base
type.
- In Name select the specific material that you will use
for the project. NOTE: After you have selected
a material, in Type you see its name.
- In Thickness, set the thickness of the material you
will be using. TIP: For folding carton, 0.5
is the standard thickness.
- Calc. thickness Sets the thickness value that EngView uses for its
calculations within resizable templates. (In parameter expressions,
this is the value represented by the d()
function.) By default, the value is inherited from that of
the parent material type. To change the inherited value, select
the check box, and then type the new value. Clearing the check
box restores the value set for the parent type.
- Real thickness Sets the actual thickness — the one that
will be used for producing the structure — and the thickness that
EngView
uses to visualize 3D models. By default, the real thickness is
inherited from both (1) the value for the parent type and (2)
the value in Calc. thickness.
How to edit Real thickness:
- To change the value along
with that in Calc. thickness, select the left
check box. When you change the value in Calc. thickness,
the value in Real thickness changes too.
- To set a value that is different
from that in Calc. thickness, select both check
boxes, and then type the new value. The value in Calc.
thickness is not affected. Clearing the right check box
restores the value in Calc. thickness; clearing both
check boxes restores the value set for the parent type.
- In Grammage, type the weight — in grams per square meter
— of the material you will be using.
- To begin selecting a ready-to-use
resizable design you need, click Next.
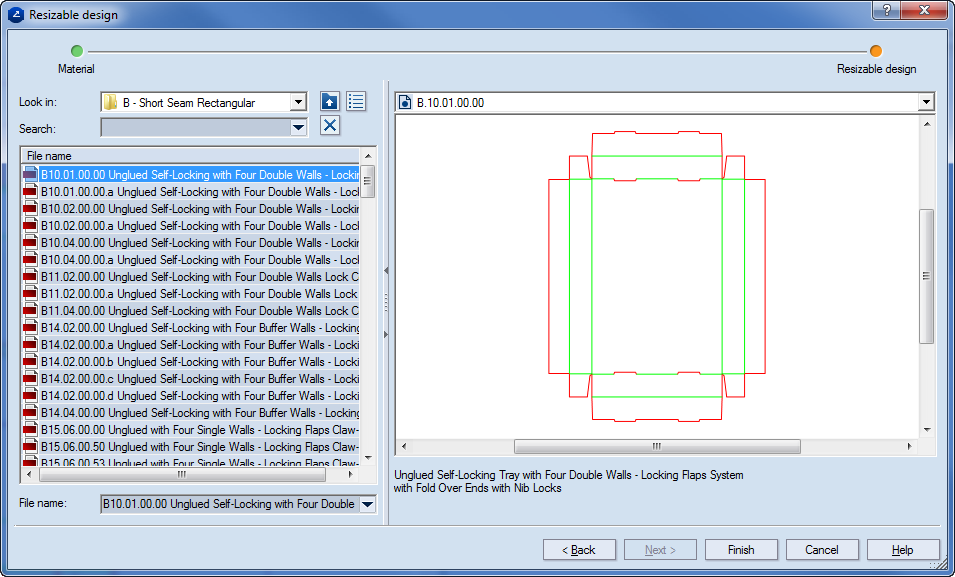
The Resizable design page opens. In
it, you browse for and then select the resizable design that will
serve as basis for your project.