You can construct an arc by sequentially positioning three points (starting, center and end), as well as the radius of the arc and the angle between the two radii connecting the center with the beginning and the end points of the arc, respectively.
An arc defined by a beginning, a center and an end has four control points: the starting and end points, the center point of the circle the arc belongs to, and a point lying in the middle of the circumferential length of the arc. While you are drawing an arc by BEC, the following pointers appear:
![]() About to draw the starting point of the arc.
About to draw the starting point of the arc.
 About to draw the center of the arc.
![]() About to draw the end point of the arc.
About to draw the end point of the arc.
NOTE: The contextual edit bars, attributes and tabular area presentation, as well as the procedures for modifying and repositioning of an arc are the same for all arc-drawing modes except for arc by BEH.
 .
.NOTE: To switch the directions in which the arc is being constructed, before you draw the end point, press CTRL.
You can use snapping while drawing arcs. Snapping guides you for the correct positioning of arc's points relative to the x- and y-axes. See the example below and try it in the program. The example applies for the drawing of arcs of the types CBE and BEC.
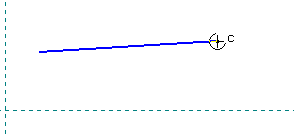
The beginning point is drawn and you proceed with placing the arc center. The center is about to be placed (indicated by the mouse pointer icon). Note that the line is still not parallel to the x-axis.
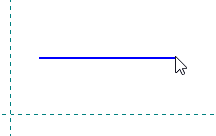
When the line becomes parallel to the x-axis, it snaps (on the screen you can feel a tiny jump in the line) and the mouse pointer changes to an arrow.
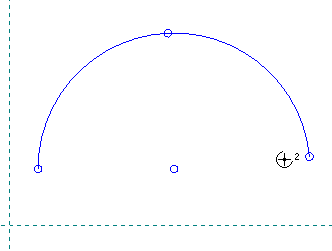
After the center has been placed, the end point comes next before the arc is drawn. Here the mouse pointer indicates that the end point is to be added. However, note that the line defined by the beginning point and the end point is not parallel to the x-axis.
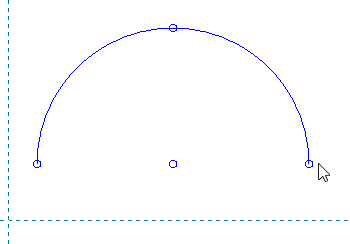
When the beginning-point-end-point line becomes parallel to the x-axis, it snaps (on the screen you can feel a tiny jump in the line) and again the mouse pointer changes to an arrow. The paralellness is visualized in the next picture.
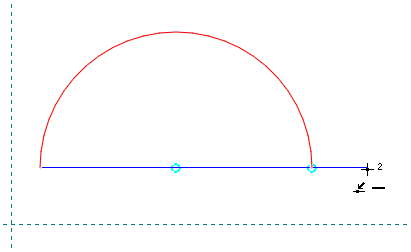
The line defined by the beginning and end points is parallel to the x-axis. This is indicated by the horizontal mouse pointer icon just below the figure 2.