You can construct an arc by sequentially positioning three points (starting, end and center), as well as the radius of the arc and the angle between the two radii connecting the center with the starting and the end points of the arc.
An arc defined by a beginning, a center and an end has four control points: its starting and end points, the center point of the circle the arc belongs to, and a point that lies in the middle of the circumferential length of the arc. While you are drawing an arc by BEC, the following pointers appear:
![]() About to draw the starting point of the arc.
About to draw the starting point of the arc.
![]() About to draw the end point of the arc.
About to draw the end point of the arc.
 About to draw the center of the arc.
NOTE: The contextual edit bars, attributes and tabular pane presentation, as well as the procedures for modifying and repositioning of an arc are the same for all arc-drawing modes except for arc by BEH.
To draw an arc by BEC
 .
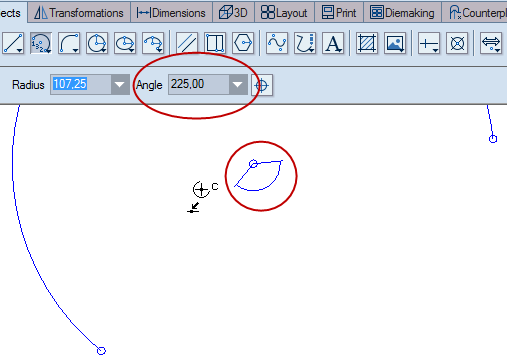
.HINT: At this point the program begins exploring the angle between the radii of the sector the arc belongs to. At each angle divisible by 45 degrees (45, 90, 135, 180, 225, and so on) a visual hint appears at the center of the sector, indicating the angle. This lets you easily choose a common angle value.
NOTE: To switch the directions in which the arc is being constructed, before you draw the center point, press CTRL.