- On the Objects toolbar, click Braille Matrix
 .
.
TIP: The button is part of the Insert Text group: Click
the Text button  , and then
drag downward to see the icons.
, and then
drag downward to see the icons.
A contextual edit bar appears above the graphical
area.

- In the matrix selection dropdown list, click and select the
matrix that you want to use for the braille text.
NOTE: An EngView installation
comes with three matrices: (1) ECMA Euro with Fastening Holes, (2)
ECMA Euro, and (3) ECMA Euro No Line Spacing. This is the standard
ECMA Euro Braille, which the European Carton Makers Association has
specified in pursuit of establishing a common standard across the
countries of the European Union. It is based on the Marburg Medium
Braille size and spacing specification, which is recommended by European
and North American standards for pharmaceutical packaging and labels.
The ECMA Euro No Line Spacing code does not
have spaces between the lines of text. This gives you freedom to decide
where a line should lie.
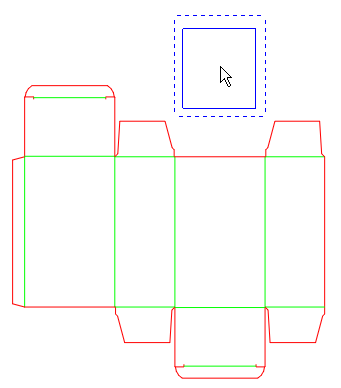
- Select the matrix that you want to work with.

The matrix appears as a rectangle that follows
the mouse.
NOTE: Although normally a matrix is rectangular, it
can have any shape
its designer decides.
- Move the mouse to where you want to place the matrix, and then
click to position it. While you are moving the mouse, consider
the following situations:
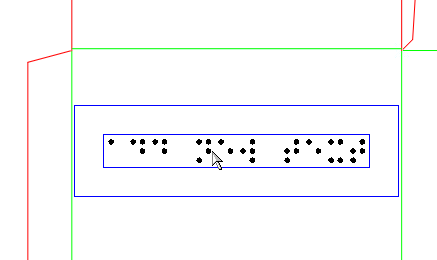
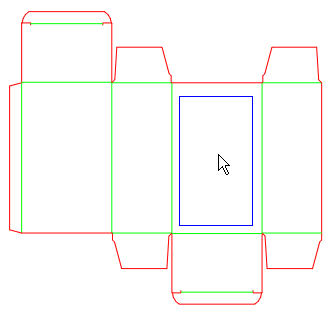
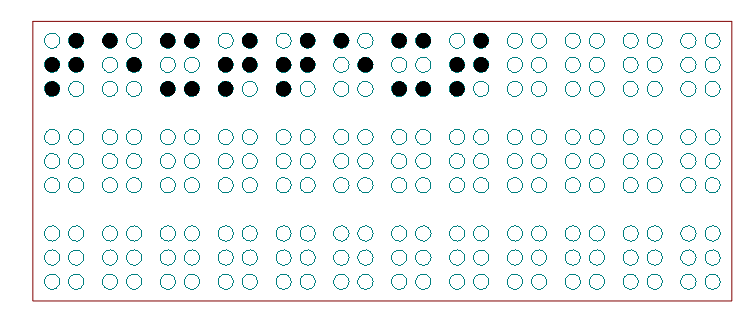
- If the program detects that the braille matrix placement zone
(must be a closed-contour area) is very close to a rectangle,
it automatically resizes the matrix to fit the detected area (pictured):
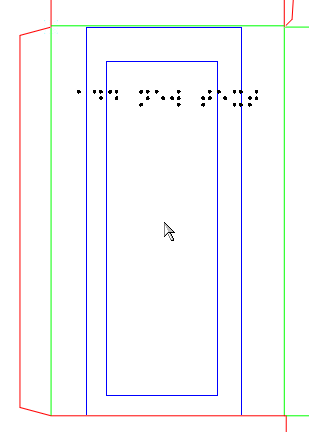
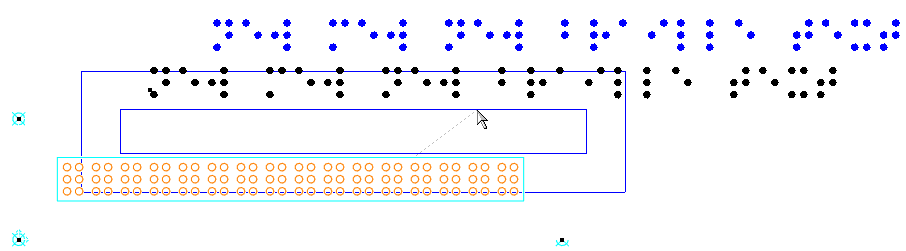
- If EngView does
not recognize the matrix placement zone as rectangular or close
to rectangular, EngView will
not resize the matrix (pictured).
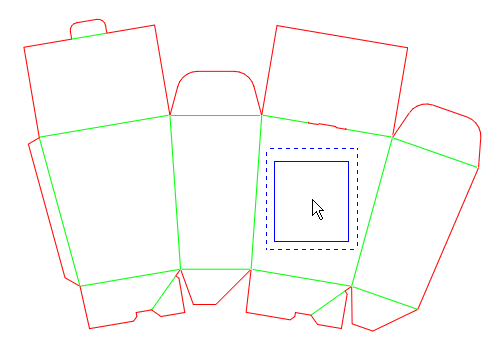
In this case, click to position the matrix,
and then use the matrix's control points to resize it across the hosting
panel.
HINT: To see the control points, right-click in an empty
area, point to Show, and then click Control Points.
After you have fixed the matrix, note the new
styles that have appeared in the Styles list in the tabular area:
Braille Matrix and Braille Matrix Hole.
You then proceed with placing the braille text
into the matrix.
- Do one of the following:
- On the Objects toolbar, click Braille Text
 .
.
- On the Objects menu, point to Texts, and then
click Braille Text.
A contextual edit bar appears above the graphical
area.

- Choose a font.
NOTE: Your installation comes with only one font, but
you can create
your own.
- In the contextual edit bar, in the text area use lower-case
letters to type the text that you need.
NOTE: The letter size that you can type depends on
the alphabet you have chosen. It must contain a description of the
letters. For details, see Designing
braille code (alphabet).
- (Optional, if you are positioning the braille text outside
a matrix) In the braille standard (matrix) drop-down list, select
the standard that you want to use.
NOTE: The standard that EngView distributes
is ECMA Euro. This is the standard which the European Carton Makers
Association has specified in pursuit of establishing a common standard
across the European Union. It is based on the Marburg Medium Braille
size and spacing specification, which is recommended by European and
North American standards for pharmaceutical packaging and labels.
- After you have typed the text, use the mouse to drag the text
into the matrix.
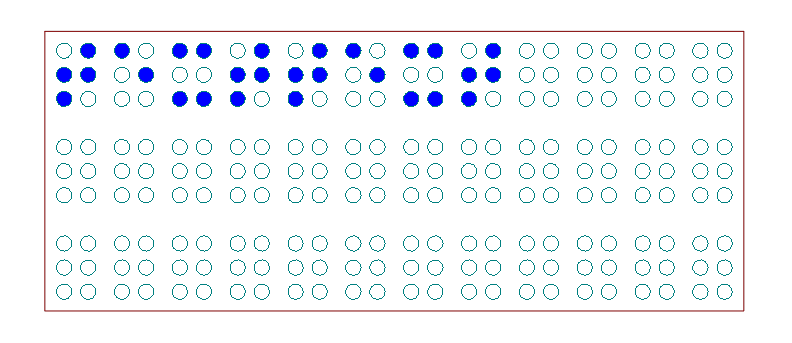
NOTE: When the text falls into the matrix field, EngView snaps
it to the grid. In other words, EngView applies
the matrix's braille code to the braille text.
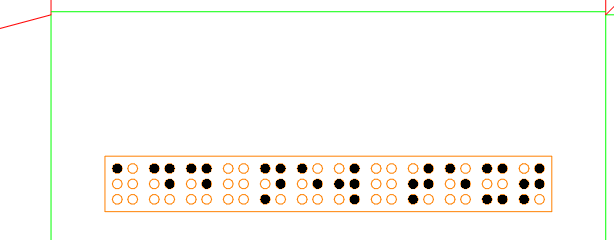
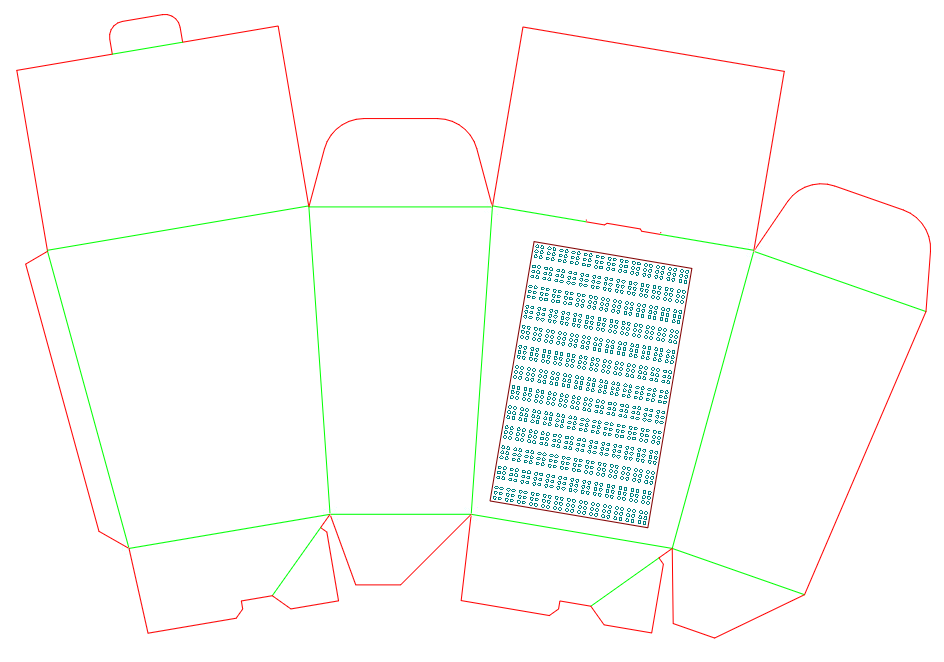
- When you have decided on where to place the text along the
matrix, click. This attaches the text onto the matrix. When the
text is positioned, the dots appear in black.
The braille text is added to the design. Note
that a braille layer has been generated that appears in the Layers
section of the Layers & Objects tab.
As a result of the text being fixed:
- When you move the matrix, the text moves along.
- When you select the text and move it to reposition it across
the matrix or outside of it, it moves but remains attached to
the matrix: when you move the matrix, the text moves along with
it.
You can move a text attached to a matrix
by selecting it and then dragging it to where you want it to be. Note
that despite this action, the text remains attached to the matrix
and if you start moving the matrix, the text will move along with
it no matter that it is away from it.
When you move the matrix, the text moves along
with it.
To make a text independent from its matrix, you must detach it.
- Right-click the text, and then click Detach from matrix.

A detached text does not move along with the
matrix.
This use case is nearly identical with the
placing of text into a matrix (see above), the only difference being
that it addresses the situation when you have an already-placed braille
text that you want to attach to a matrix.
- Drag the text into the matrix, and then click to fix it.
- Right-click the text, and then click Attach to matrix.
You can continue to move the text across the matrix and position
it where you need it. It stays fixed to the matrix dots.