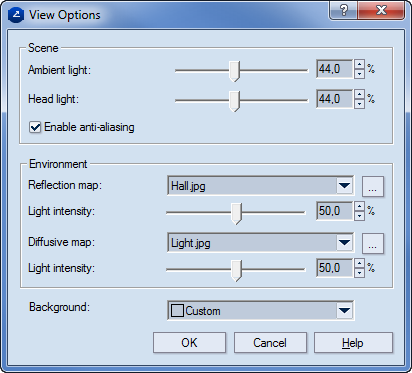
Use this dialog box to define how you want EngView to light 3D representations.
TIP: It is best if you spend some time playing with the settings in this dialog box to achieve the lighting that you want it. You can start by (1) loading a preset and then modify its settings, or (2) lighting a scene from scratch.
| Scene | Settings that control the scene's active and passive lighting |
|---|---|
| Ambient light | The light in the surrounding environment. In 3D scenes, we
have one directed light — on the head of the viewer — and one
source of ambient light.
NOTE: Learn more about how to set the intensity of these lights. |
| Head light | Sets the intensity of the light emitted towards the object. |
| Enabling anti-aliasing | Prevents the appearance of jagged edges in images represented by pixels (raster images). |
| Environment | Settings of the background visualization, the appearance of pointed-to objects, and the display of selected objects. |
| Reflection map | This is the image that comes from the environment and is reflected on the object's surface. The image set here becomes the default one for the exporting of models in the PDF or VRML formats. |
| Light intensity | Sets how strongly the environment is reflected on the 3D object's surfaces. |
| Diffusive map | In matte surfaces, sets how the surface reflects diffuse light. |
| Light intensity | Sets how strongly diffuse light is reflected. |
| Background | Sets a color for the background. |