Depending on the type of drawing you are working on, you see a different set of style icons on the program's toolbar. A style icon is a shortcut to a style and makes it easier to apply that style on objects.
A EngView installation comes with a fixed set of style icon sets: Default, Counterplates, Male die, Female die, and Varnish. Each set appears automatically in the respective drawing type.
By default, each style icon set has its own set of style icons, which correspond to the styles most often used while working in the respective type of drawing.

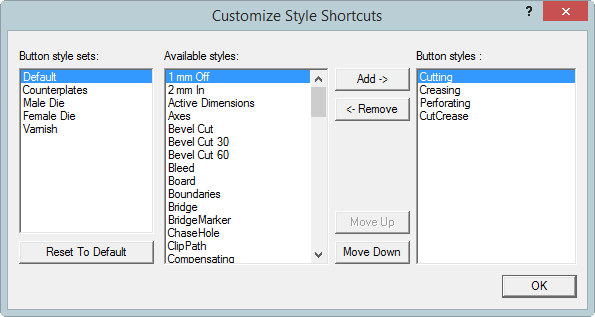
The style icons for the Default style set. The available icons are for the styles Cutting, Creasing, Perforating, and Cut-Creasing.
Depending on your personal working routine, in each style set you may need to use styles that are different from the default ones. That is why you can set your own style icons to easily reach on the toolbar while working. The setting and arrangement of these style icons takes place in the System Configuration Utility.
To set and arrange custom style icons
The EngView System Configuration Utility dialog box appears.
The Customize Style Shortcuts dialog box appears.
NOTE: If you carry out the above procedure while EngView is open, the changes will take effect after you restart the program.