 .
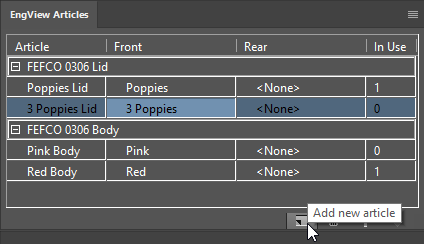
.When you open an EngView file in Illustrator, the program lists all project's drawings in EngView Design Articles panel. For each of them, an article has been created automatically.
NOTE: You can change the article's default name: Click the name's box, and then type a new name that makes sense to you.
In Illustrator, the canvas area has as many artboards as there are drawings in the EngView file. Each artboard corresponds to the artwork for the front side of the drawing.
When you add graphical content to an artboard, it visualizes automatically in the EngView 3D panel — the artwork is attached to the article being visualized.
========================
========================
You can create new articles in which to make combinations of the available front and rear artworks.
To create an article
 .
.
NOTE: In a drawing, you can create an article (1) by copying the artwork of an existing article or (2) without copying any artworks. For (1), select the drawing's tab, and then click New Article  . The newly created article will not have any artworks selected for its front and rear sides — in their cells you will see <None>. For (2), select an existing article, and then click New Article
  . The newly created article will appear with the selected article's front and rear artworks. See the following pictures for examples:

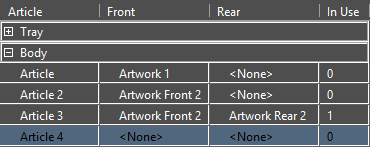
Article 4 was created when the mouse pointer was on the drawing's tab. As a result, no artworks have been copied for its front and rear sides.

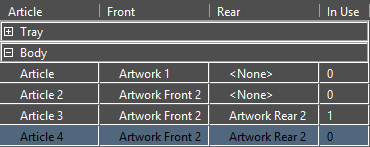
Article 4 was created while Article 3 was selected. As a result, the artworks for Article 3's front and rear sides have been copied to Article 4.
A new article record appears in the list.
After you have created the article, you proceed by assigning front and rear artworks for it.
A list appears of the available artworks.

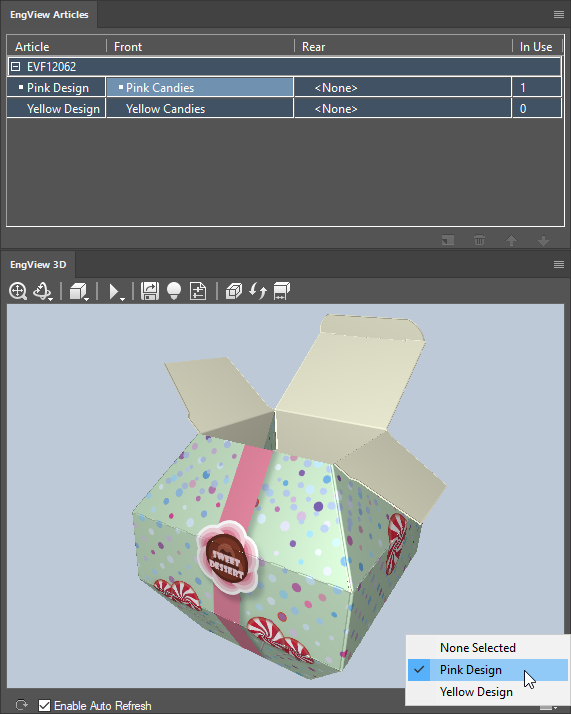
Switching between articles takes place in the 3D panel. You do not need to have any panel selected to switch between articles.
NOTE: If the project consists of a single structure, you do not need to have a panel selected to switch between its articles. If you are working with a multiple-part structure, in the 3D preview area, click a part. This makes available the Select Article button.
To switch between articles
When you have a structure with more than one part, the Select Article button becomes available after you select any part in the>EngView 3D window.

A list of the available articles appears.
When you have a structure with one part, the Select Article button is available by default.

NOTE: Clicking None Selected removes the current article from the 3D model, leaving the model without any article applied to it.
After you have switched the article, notice that in the EngView Articles panel the dot that indicates the currently applied article has moved to the newly applied article.
NOTE: The following procedure explains how to create an artwork-carrying artboard in an article; it is not about adding graphics to an artboard.
To create an artwork

The New Artwork dialog box appears.

NOTE: In the brackets, you see the name of the artwork whose graphics the program will copy to the new artwork.
After you click OK, the following happens: