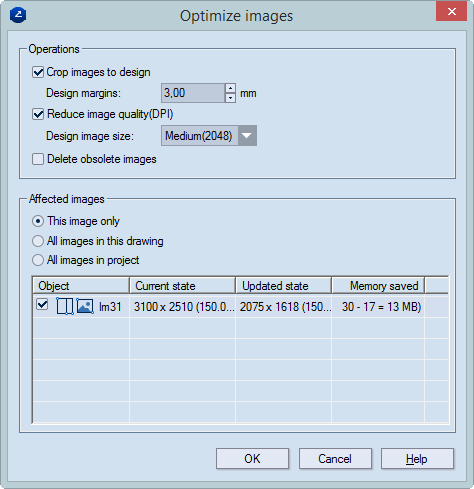
Operations Settings for what you can do to inserted images. NOTE: These settings are applicable, for example, when the inserted image is too large in terms of DPI or size or both and you do not need it for any other purpose but to see it in the 3D model. In such a case, modifying the image size and properties makes sense as it requires less computer's resources and does not slow down your system.
Crop images to design Cuts the image to match the size of the design. If the image needs to spill over the design, you can set the relevant margins in Design margins.
Design margins Sets the margins into which the image spills over the design.
Reduce image quality (DPI) Reduces the number of dots per inch for the image as required for the printing purposes. For example, if the image is of too high a quality that you do not need — because of the hardware resources it will consume — you can reduce the image quality (DPI) to a level that suits your purposes.
Design image size Sets a quality, in dots per inch, for the image. Options: High (4096), Medium (2048), and Low (1024).
Delete obsolete images In the drawing, removes all images that fall outside the design.
Affected Images Options for where to apply the settings in Operations
This image only Applies the settings only to the image that is being optimized.
All images in this drawing Applies the settings to all images in the drawing.
All images in project Applies the settings to all images in the current project.
The table A list of the images to which the above actions can be applied
Object Shows the name of the image file and the editing that it has been done to it — for example, cropping or downsampling. USAGE NOTE: To apply the selected action to an image, select its check box.
Current state Shows the size and, in brackets, the DPI of the original image.
Updated state Shows the size and, in brackets, the DPI of the image after it has been edited.
Memory saved Shows the image file size before and after the editing.