Assigning objects to process layers
By assigning objects to process layers you make the surface effects set to the layers apply to these objects. All objects assigned to a particular process layer are listed in the Objects section in the tabular area when the layer is selected in the Layers section.
IMPORTANT:
- Due to technological purposes, objects in the styles related to the diecutting process (Cutting, Creasing, Perforating, Cut-creasing) as well as the objects defined in the styles Dieboard and Sheet cannot be assigned to surface process layers. For example, if you select a dust flap and begin assigning it to the Color print layer, EngView will stop the operation, because the dust flap's structure has objects in the Cutting and Creasing, which cannot be subjected to color printing. However, if in the same dust flap a color printing job has to be done on an image that covers the dust flap's entire area, the image, and not the dust flap, needs to be selected and assigned to the Color print process layer.
- You can assign objects only to existing process layers.
To assign an object to a process layer
- Do any of the following:
- In the graphical area, select the object(s) that you want to assign to a process layer.
- In the Objects section in the tabular area, select the object(s).
- Depending on which selection method you have chosen in Step 1, consider your situation:
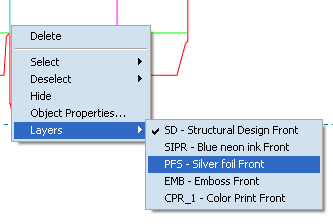
- IN THE GRAPHICAL AREA: Right-click, point to Layers, and then click the process layer to which you want to assign the object(s).

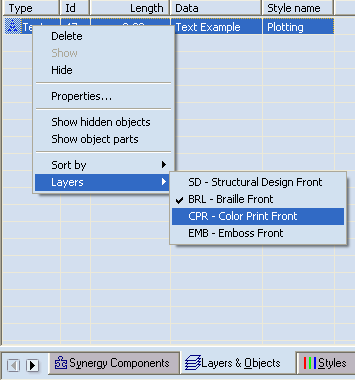
- IN THE TABULAR AREA: Right-click, point to Layers, and then click the process layer to which you want to assign the object(s).

Although the object is still visible in the old layer, it is now assigned to the new layer. Select the new layer to see it there.
NOTE: To de-assign objects from a process layer without assigning them to another, in Step 3 assign the objects to the structural layer (SD–Structural Design).

