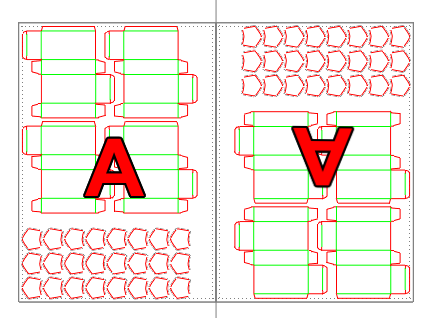
Layout with nesting arrangement on a single sheet
Creating layout with nesting is used when you need to make a layout of 1ups with irregular shapes or at least with 1ups whose shapes differ considerably from any shape that approximates a rectangle. Using the template-based or automatic layout modes for irregular shapes would result in much greater waste. By using nesting, you set the sheet and the number of 1ups that you want to produce.
During the population of the sheet, the program processes each 1up separately according to the conditions set.
To carry out layout with nesting arrangement
- Do one of the following:
- On the , click New Layout Drawing
 .
.
- On the Layout menu, click New Layout Drawing.
- Press CTRL+L+N.
The Select Layout dialog box appears.
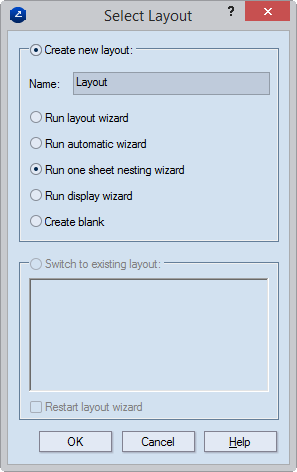
- Click Create new layout, and then click Run nesting wizard.
The Nesting Wizard dialog box opens at the Parameters page.
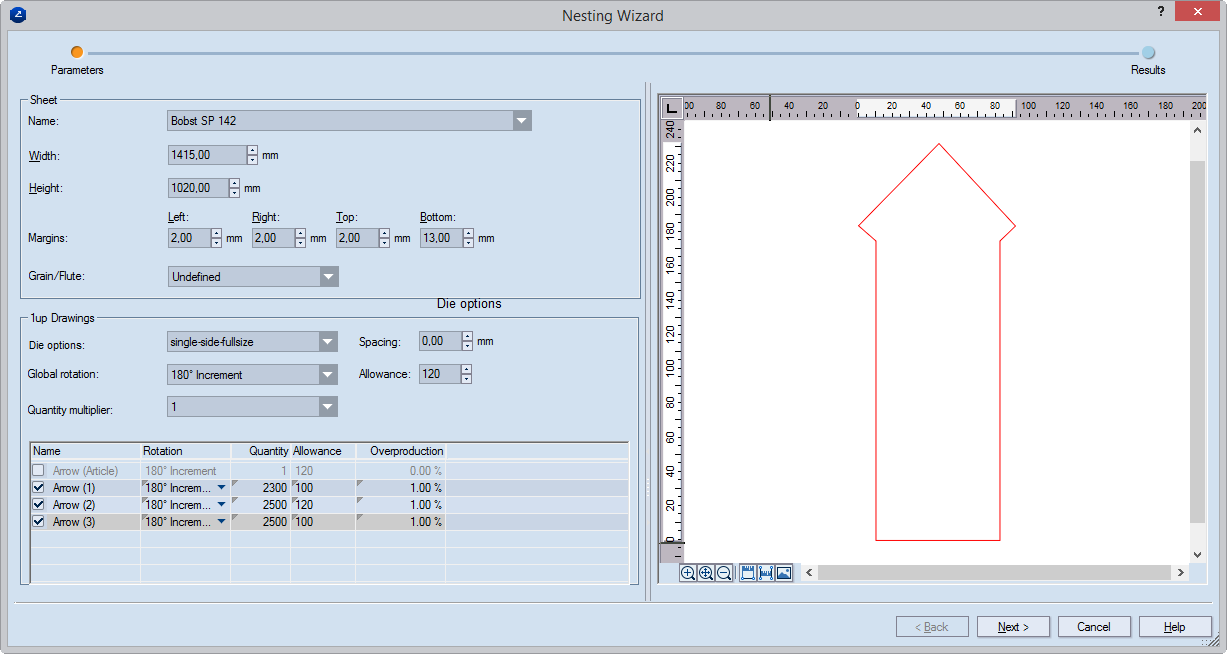
Sheet Settings that define the sheet that will be used to hold the layout. IMPORTANT: If a specific sheet is selected from the list, its Width and Height values are fixed; if you then begin editing these values, the selected sheet is discarded and the list displays User-defined.
Width Sets the width of a user-defined sheet.
Height Sets the height of a user-defined sheet.
Grain/Flute Sets grain or flute direction for the sheet. The options are:
- Undefined Either the material has no grain/flute or that the grain/flute has no relevance for how the 1ups are arranged.
- fdX The grain/flute is parallel to the x-axis (the width of the sheet).
- fdY The grain/flute is parallel to the y-axis (the height of the sheet).
Margins Settings that define the margins of the sheet.
1up Drawings Settings that define how the layout 1ups will be arranged on the sheet.
Half-die options Settings that define the printing and cutting processes for sheets that are twice as large as the cutting die. What you set here defines how the 1ups will be nested in the next step. By using half-dies, a large-size sheet is printed out, which is then cut in two with a guillotine. The resulting two identical sheets are then die-cut. The benefit here is that the die size is halved, despite the doubling of the number of die strikes.
Choose a sheet orientation. The options are:
- Work and Turn (vertically flipped layout) The layout is divided in two, the right side a vertically flipped version of the left.
- Work and Tumble (horizontally flipped layout) The layout is divided in two, the lower section a horizontally flipped version of the upper. Through this technique, the front of the 1ups is printed on one half of the sheet and the rear on the other half. The sheet is then tumbled and printed with the same plate again. The two 1up sides are printed without the need for a plate change.
- Single Side Full Size (full-sheet layout) The cutting die is as large as the sheet. The layout is shown in full size with the die striking twice. Only one side of the sheet is printed.
- Single Side Half Size (vertically rotated layout) The cutting die is half as large as the sheet size. The layout is divided in two, the right side being a 180-degree-rotated version of the left.
- Single Side Both Sizes Combines the Singe Side Half Size and Singe Side Full Size arrangements (see above in this list). The results are displayed in the next step.
Global Rotation Sets all 1ups in the sheet to be rotated at a specified angle that you select in the drop-down list. If you need individual 1ups rotated at a specific angle, do this in the 1up's Rotation column.
Quantity Multiplier Set a value here by which to multiply the values you will enter in the Quantity column. This comes handy especially when you're working with large numbers. In the above example, if you want to produce 2,000 pieces from each of the 1ups, enter 2. The 1ups' values are multiplied by 1000 automatically. If you need a specific count for a 1up, edit it separately in its Quantity box.
Allowance The spoilage. Displays the number of pieces produced for the purpose of setting up the die and will then be recycled. It appears automatically in the 1ups' Allowance cells. If you need a specific allowance for a 1up, edit the value in the 1up's Allowance cell.
Spacing Sets a global value for the distance between the 1ups in the array.
Name The name of the 1up as it is created in your project. If you do not want a 1up to take part in the layout, leave empty the check box in front of the name.
Rotation Sets an angle of rotation for the 1up during the filling of the sheet. This means that the program will rotate the particular 1up only at the angle you have specified. The options are:
- Free Rotation The program tries various rotations until an optimal layout is achieved.
- Increment (90-degree, 180-degree) The program populates the sheet by successively rotating the layout 1up by a step of either 90 or 180 degrees. For example, if you select 90 degrees Increment, the program will compute the optimal solution by making successive attempts, each time rotating the layout 1up at 90 degrees.
- Fixed The program populates the sheet by keeping the 1up at the selected angle. For example, if you select 270 degrees Fixed, the program will compute a layout variant with the layout 1up rotated at 270 degrees.
- With Grain Takes account of the grain or flute if a grain/flute direction has been set in Grain/Flute.
Quantity Set how many pieces of this 1up you want produced.
Allowance Set spoilage for the current 1up. Spoilage is the number of excess pieces that will be produced for the purpose of setting up the die. After the die setting up is done, these pieces are recycled.
Overproduction Specify as percentage the amount of production that the customer is willing to pay for in excess of the combined amount set in Quantity + Allowance.
 Single Object Dimension A tool for measuring individual objects.
 Associative Dimension A tool for measuring distances or angles between two objects.
 Show Images Clicking the button toggles between displaying and hiding images in the design.
- Edit the settings as you want them to be, and then click Next.
The Nesting Wizard dialog box opens at the Results page.
NOTE: When the page opens, the program starts computing the variants for the arrangement of the 1ups in the sheet. This process may take some time, depending on the number of 1ups involved.
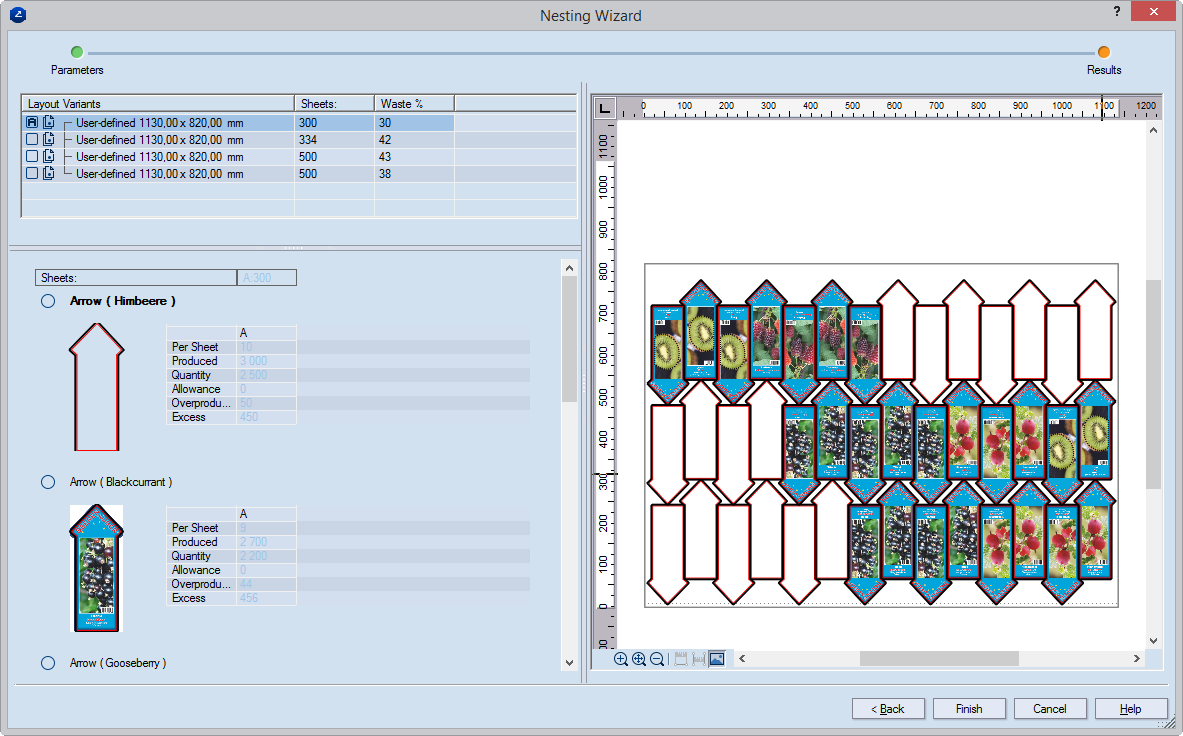
Layout Variants A list of layout variants that the program has computed
Sheets Shows how many pieces there are in a sheet
Waste (%) The percentage of the waste in relation to the total rea of the sheet
Sheets Displays how many sheets will be used for producing the current production run and using the current variant. NOTE: When multiple layout variants are selected, they are presented in a table and are indicated by letters (see Step 4 (ii) below).
Per Sheet Displays how many pieces of this design are featured in a single sheet.
Produced Displays how many pieces will be produced by using the calculated number of sheets (see Sheets). The number = Sheet*Per Sheet.
Quantity Displays the number set in Quantity in the Parameters step.
Allowance The spoilage. Displays how many pieces will be produced for the purpose of setting up the die and will then be recycled. NOTE: The spoilage count is calculated on the basis of the percentage set in Allowance in the Parameters step.
Overproduction Displays how many pieces will be produced above the number set in Quantity + Allowance. These pieces are used for the technological setup of the die. After the setting up is done, they are recycled.
Excess Displays how many pieces of the 1up will be produced in excess of the calculated production run. The number = Produced — (Quantity + Allowance).
- Compare the variants that the program has offered. Follow these guidelines:
IN THE LAYOUT VARIANTS LIST
- To begin comparing layout variants, in the Layout Variants columns select the check boxes in front of the names of the variant you are interested in.
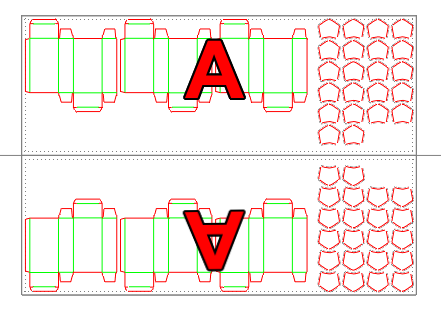
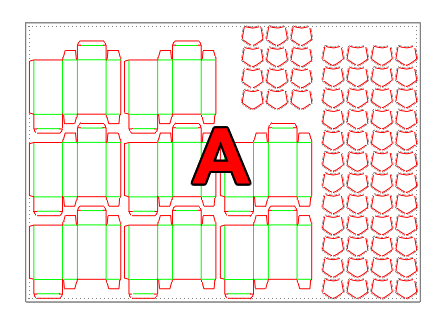
As you select check boxes, note the letters that the variants get. The arrays for the selected layout variant appear in the preview area.
NOTE: If in the list you select a variant whose check box is not selected, its array appears in the preview area marked as SELECTED; all the rest appear indicated by their respective letters.
IN THE 1UP LIST
- Each 1up featured in a layout variant comes with a table that lists statistics for the 1up as it is featured in the variant. Each 1up table has as many columns as are the selected layout variants in which it is featured. Each column has a heading — A, B, and so on — that is identical with that of the variant. The column that lists the 1up statistics for the currently selected layout variant is highlighted in color (see the image in Step 3 above).
- To complete the layout, in the list select the layout variant that best suits your needs, and then click Finish.