Starting a project from an external 3D object
You can start a project by importing an
external 3D object. This is the case where you have an object that
you need to find packaging for.
First, you select an external object and
then a design in which to fit the object.
To start a project by importing an external
3D object
- Do any of the following:
- Click New project
 .
.
- On the File menu, click New.
- Press CTRL+N.
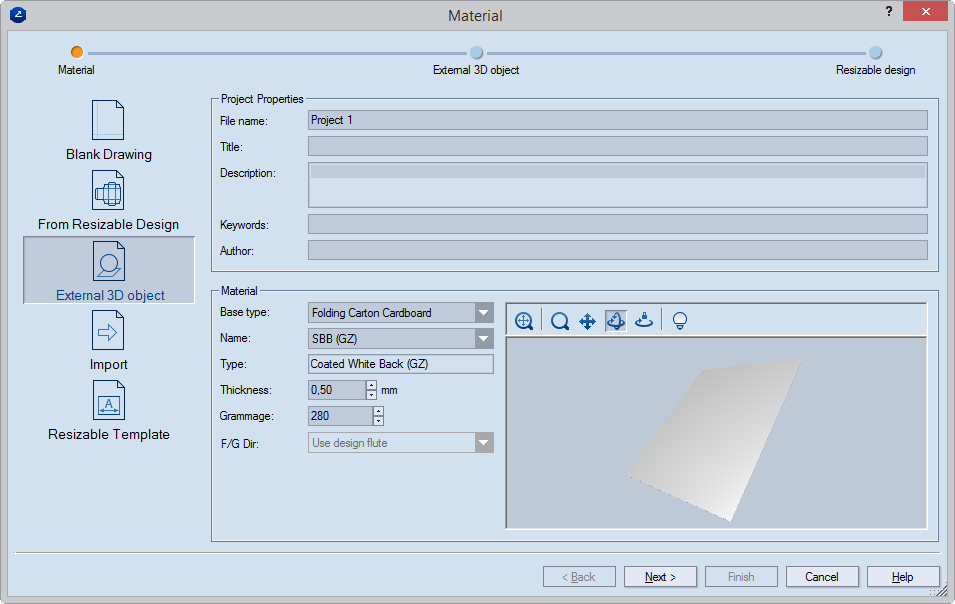
The Material dialog box appears. In
it, you enter general information about the project and set the project's
constructional properties.
- Click External 3D Object.
- Under Project Properties, type general information for
the project: name of the EVD file; title for the project; general
description of what the project is about; relevant keywords; and
the name of who created the project.
- Under Material, in Base type select the base
type of the material.
NOTE: The library of base types follows a tree-like
structure, and as you browse deeper into it and select a type, in
Name the program displays only the types that fall within the
selected type group. For example, click the Base type drop-down
list, select Folding Carton Cardboard, and then select White
Lined Chipboard (WLC). When you later start browsing in Name,
you will be browsing only the materials grouped under the WLC base
type.
- In Name select the specific material that you will use
for the project. NOTE: After you have selected a material, in
Type you see its name.
- In Thickness, set the thickness of the material you
will be using. TIP: For folding
- In Grammage, type the
weight — in grams per square meter — of the material you will
be using.
- After you have entered the project information you need, to
begin selecting an external object, click Next.
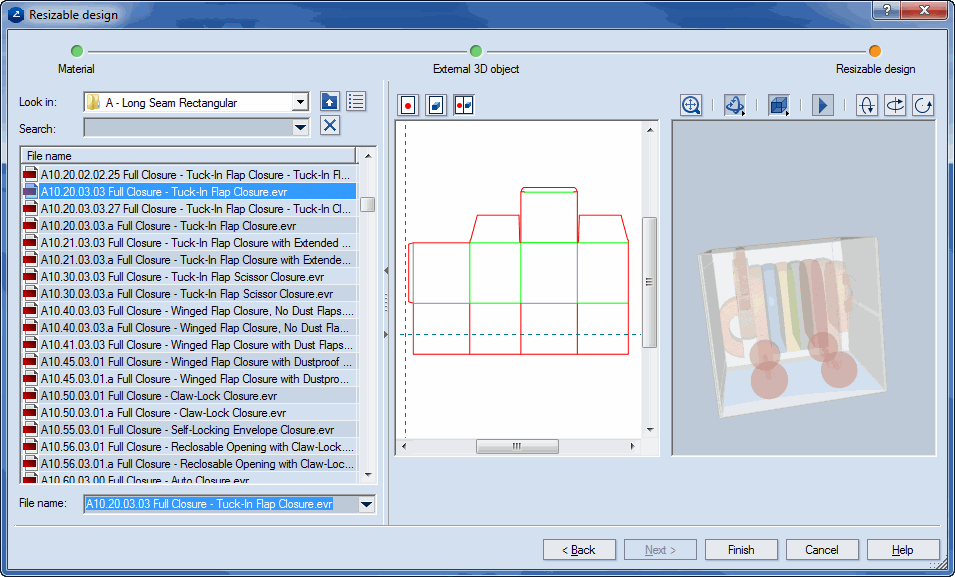
The wizard opens the
External 3D Object step. In it, you select the external object
that you want to use.
 2D
View The preview area displays a 2D drawing of the selected resizable
design.
2D
View The preview area displays a 2D drawing of the selected resizable
design.
 3D
View The preview area displays a 3D representation of the selected
resizable design.
3D
View The preview area displays a 3D representation of the selected
resizable design.
 Multi
View The preview area displays the selected resizable design in
a split window, with both a 2D drawing and its 3D representation.
Multi
View The preview area displays the selected resizable design in
a split window, with both a 2D drawing and its 3D representation.
 Zoom to fit Makes the design in the graphical
area fit the current size of the area.
Zoom to fit Makes the design in the graphical
area fit the current size of the area.
 Zoom Launches the zooming mode for the
graphical area.
Zoom Launches the zooming mode for the
graphical area.
 Phase navigation
Opens a for
playing back a folding sequence, respectively, play back the folding
sequence, fold a selected phase, fold the selected step, pause, unfold
a step, unfold a phase, reverse-play the folding sequence.
Phase navigation
Opens a for
playing back a folding sequence, respectively, play back the folding
sequence, fold a selected phase, fold the selected step, pause, unfold
a step, unfold a phase, reverse-play the folding sequence.
 Wireframe Presents the design by only
showing the edges and not the panels.
Wireframe Presents the design by only
showing the edges and not the panels.
 Transparent Presents the panels of the
design as transparent.
Transparent Presents the panels of the
design as transparent.
 Solid Presents the panels of the design
as nontransparent.
Solid Presents the panels of the design
as nontransparent.
 Rotate
X Rotates the inserted object relative to the x-axis.*
Rotate
X Rotates the inserted object relative to the x-axis.*
 Rotate
Z Rotates the inserted object relative to the z-axis.*
Rotate
Z Rotates the inserted object relative to the z-axis.*
 Rotate
Y Rotates the inserted object relative to the y-axis.*
Rotate
Y Rotates the inserted object relative to the y-axis.*
* The button is unavailable for resize-resistant objects. For these
objects, no workable idea can be put forward as to their which their
length, height or depth sides are.
- In Look in, browse to where the resizable design is
that you need, and then, in the list that appears below, select
the resizable design that you want.
- In the File name list, select the resizable design
that you want.
IMPORTANT: There are some specific considerations
to be taken into account when external objects are being placed between
panels that combine more than one thickness.
- After you have selected the design, to begin working on the
project, click Finish.