Starting a project by importing an external file

  1. Do one of the following:

The Material dialog box appears. In it, you enter general information about the project and set the project's constructional properties.

  1. Click Import.
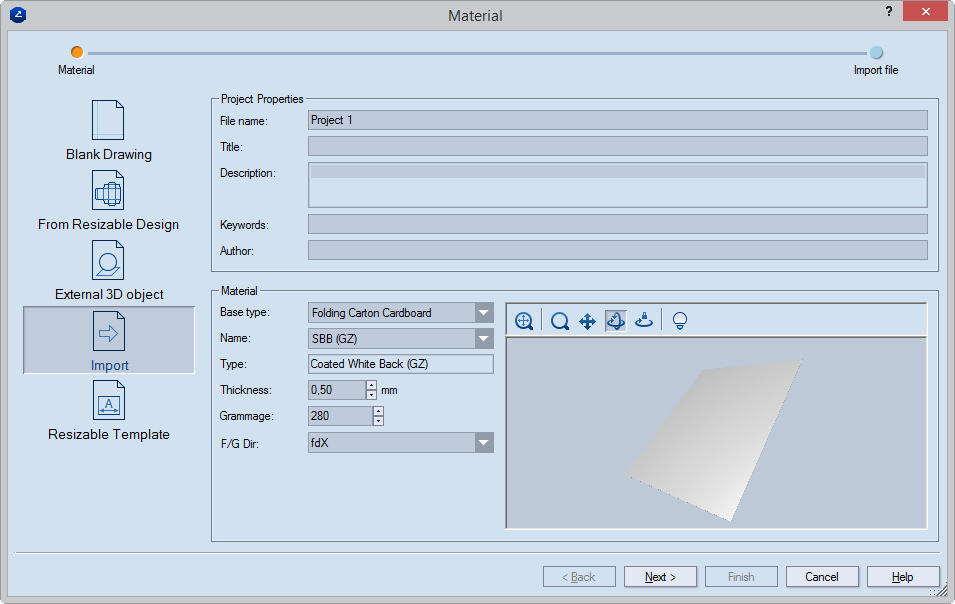
  1. Under Project Properties, type general information for the project: name of the EVD file; title for the project; general description of what the project is about; relevant keywords; and the name of who created the project.
  1. Under Material, in Base type select the base type of the material.

NOTE: The library of base types follows a tree-like structure, and as you browse deeper into it and select a type, in Name the program displays only the types that fall within the selected type group. For example, click the Base type drop-down list, select Folding Carton Cardboard, and then select White Lined Chipboard (WLC). When you later start browsing in Name, you will be browsing only the materials grouped under the WLC base type.

  1. In Name select the specific material that you will use for the project. NOTE: After you have selected a material, in Type you see its name.
  2. In Thickness, set the thickness of the material you will be using. TIP: For folding carton, 0.5 is the standard thickness.
  3. In Grammage, type the weight — in grams per square meter — of the material you will be using.
  4. In F/G Dir, set the direction of the material flute or grain. NOTE: You can set the default value in general options.
  5. After you have entered the needed basic information, to proceed with the selection of a file to import, click Next.

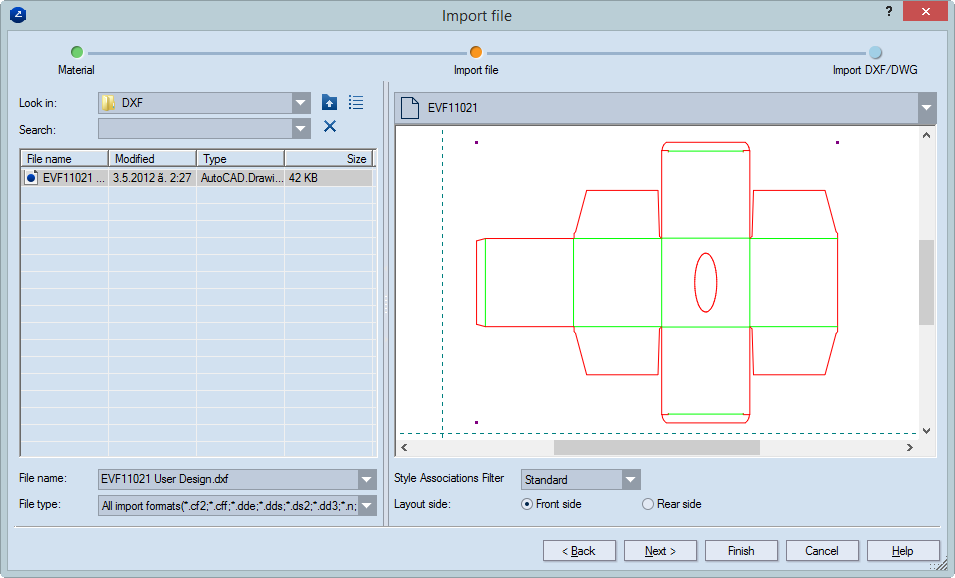
The Import file wizard page opens. The wizard opens the Import file step. In it, you select the 
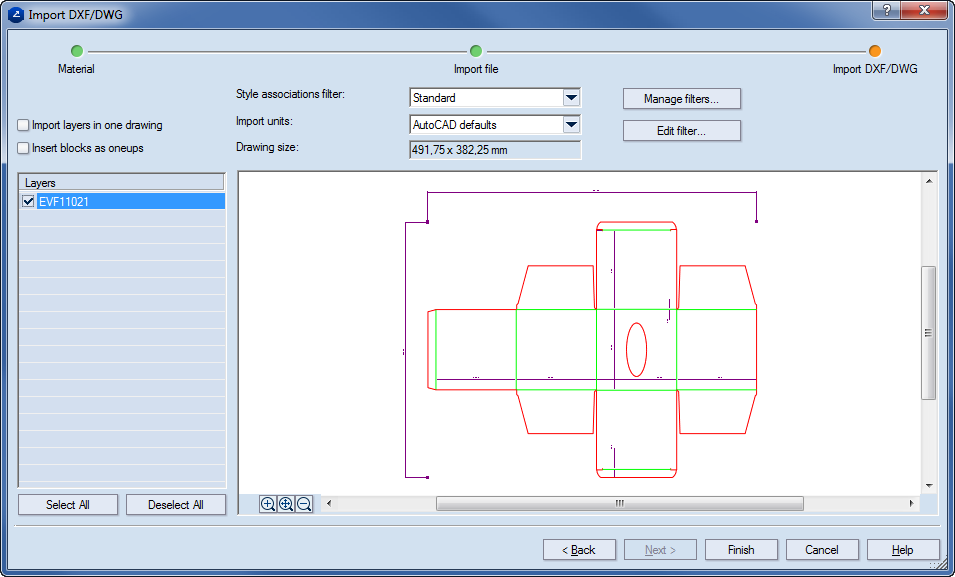
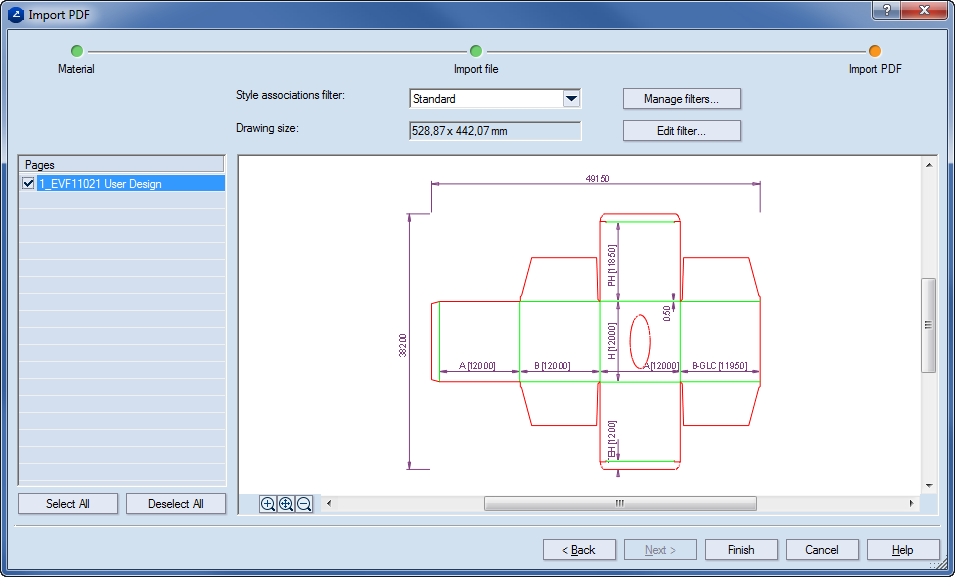
file that you want to import. NOTE: When you are importing PDF or DXF/DWG files, an additional third step appears. For details, see Step 14.

  1. In the Files of Type list, select a CAD/graphical import format: Common File Format CFF2 (CF2), DDES (DDE; DDS), AutoCAD DXF (DXF), Encapsulated Post Script (EPS), DieCAD (N), Adobe Illustrator (AI) or Enhanced meta file (EMF, WMF).
  2. In Look in, browse to where the external file is that you need, and then, in the list below, select the file that you want.
  3. In Style Association Filter, select the filter to use for associating the objects in the external file — their color, thickness, stipple and layers — with styles used in EngView.
  4. In Layout side, select how the side you're currently viewing will be treated in the project — as front side (where the printing will be applied) or as the rear side.
  5. Consider your situation:
  1. (Applies for import of PDF and DXF/DWG files.)

The Import DXF/DWG page appears.

The Import PDF page

  1. To import the file's blocks/layers into a single drawing, select the Import layers in one drawing check box.
  2. To import each of the file's blocks/layers into separate drawings, select the Insert blocks as 1ups check box.

TIP: To import the blocks/layers into a single drawing and simultaneously as separate drawings, select the check boxes in steps 9 and 10.

  1. To associate the objects in the imported file to available styles in EngView, in Style associations filter select the association scheme that you need. TIP: To add a filter or edit an existing one, click Manage filters, and then add or edit a filter as you need them.
  2. To edit the currently selected style association filter, click Edit filter, and the do the editing.
  3. (DXF/DWG files only) To choose the units in which the import will be carried out, in Import units select the units that you want to work with.
  4. In the Layers area, select the layers that you want to import.
  5. To import the file and begin working on the project, click Finish.