Customizing toolbars
You can create your own toolbars that contain the commands that you need. You can make custom toolbars floating or tabbed.
To create a custom toolbar
- On the View menu, point to Custom toolbars, and then click Customize.
The Customize Toolbar dialog box appears.
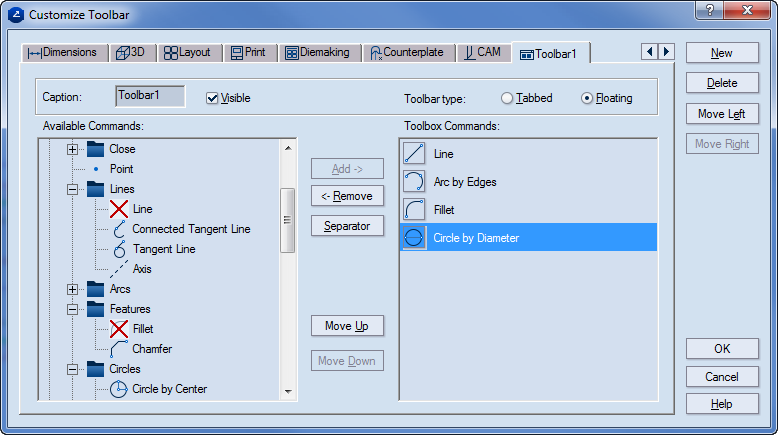
- Click New.
A tab default-named Toolbar1 appears next to the rightmost tab.
- In Caption, type a name for the toolbar. In Toolbar type, click an option to make the new toolbar tabbed or floating.
- Select the Visible check box to make the toolbox visible.
- Under Available Commands, click the plus symbol next to a menu of commands to expand the menu.
- Select commands that you want, and then click Add to add them to the new toolbar.
The set of commands for the new toolbar appear under Toolbox Commands.
- (Optional) Use the Separator and Move Up and Move Down buttons to arrange the commands in groups within the new toolbar.
- (Optional) Use the Move Left and Move Right buttons to position the new toolbar in relation to the rest of the toolbars.
To edit a custom toolbar
NOTE: Only custom toolbars can be edited and made floating or tabbed — the default ones are always tabbed and can only be moved to a different position.
- On the View menu, point to Custom toolbars, and then click Customize.
- In the Customize Toolbar dialog box that appears, make the changes you need.
To delete a custom toolbar
NOTE: You cannot delete the default toolbars.
- On the View menu point to Custom toolbars, and then click Customize.
- Open the custom toolbar that you want to delete.
- Click Delete.