 .
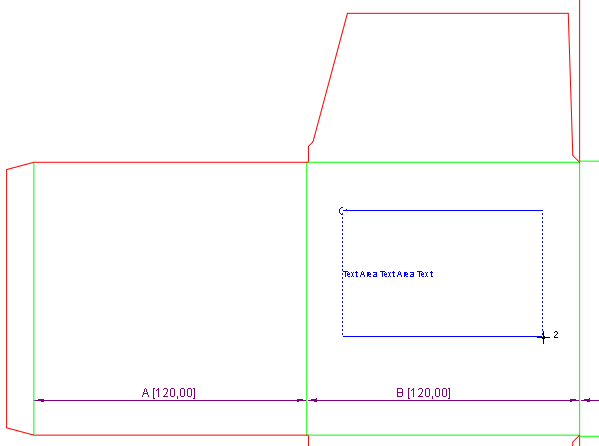
.You can add text areas to drawings. Text areas are containers of text that you position onto a specific place on a structure, ensuring that the text takes up the exact area in which you want to see the text.
You can add text areas to any drawing you like — 1up. Text areas can contain only text.
Text areas are always rectangular. Text areas added to the 1up drawing are automatically transferred to the drawings layout, CAM, print and 3D drawing.
Text areas can be turned into placeholders, to serve the needs of packGATE projects.
To position a text area
.A contextual edit bar appears above the graphical area.

Note that the mouse pointer has changed, indicating that you can begin drawing the text area.
The Object Properties dialog box appears.
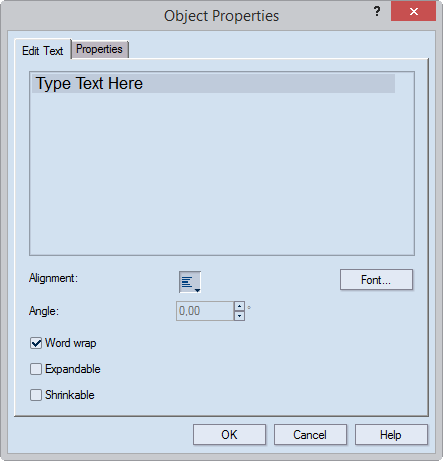
Vertical alignment Sets the text's vertical position. Click, and then drag downward. Then, from the positioning options that appear, select how you want the text aligned within its bounding rectangle.
Angle (Read-only) The angle at which the typed text is positioned. NOTE: The value is read-only and is unavailable for editing. To edit it, close the dialog box, and then use the angle control on the contextual edit bar.
Word wrap Wraps overlong, multiple-lines text to make it always visible.
Expandable The text expands to fill up the available area of the drawn rectangle.
Shrinkable Texts that are too large to fit the area shrink to fit the available area of the rectangle.
Font Click to choose a font and its properties for the text.
TIP: To make the text always fill up the text area and resize accordingly as you change the rectangle, select both the Expandable and Shrinkable check boxes.
TIPS: You can further adjust the position and size of the text area and the text as the situation may require. You can do this by:
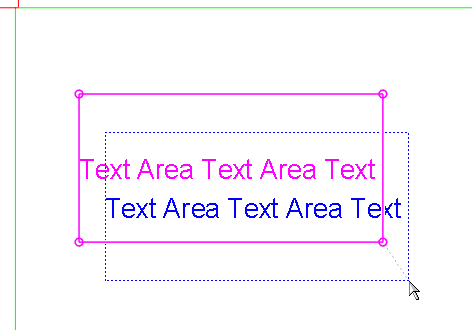
Tips
While you are placing a text area in a parametric drawing, you can create a dependency between the text area's size and the box's structure. You can do this in two ways:
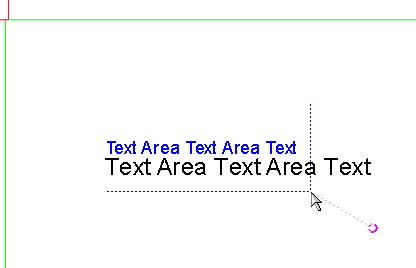
IMPORTANT: You cannot edit the text in the component.
NOTE: By using a component, you can use formulas for controlling the size of the text area. For example, TAW = A/2, TAH = H/7.