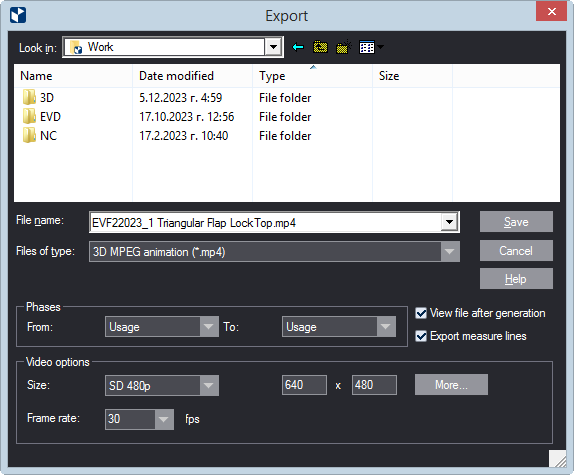
| Phases | Settings that determine which phases of the 3D model will
be included in the exported file. In From, select the
starting phase; in To the end phase.
IMPORTANT: The phase starts at the selected phase's end state. That is, if you want the animation to start at the beginning of a phase, in Start at select the name of the previous phase: its end state coincides with the initial state of the phase you need. --End-- indicates the end state of the phase set in To. |
|||||||||||||||||||||
|---|---|---|---|---|---|---|---|---|---|---|---|---|---|---|---|---|---|---|---|---|---|---|
| View file after generation | Select if you want the exported file to play automatically after it has been generated. | |||||||||||||||||||||
| Export measure lines | Select to tell EngView to export the measure lines added
to the 3D model.
IMPORTANT: When the check box is selected, the measure lines are exported regardless if you have elected to hide them in the 3D model area. |
|||||||||||||||||||||
| Video Options | General settings of the exported video | |||||||||||||||||||||
| Size | Sets the height and width of the exported video file. You
can use presets (from the dropdown list) as follows:
IMPORTANT: To ensure that the exported animated 3D model fits in the exported frame, before exporting:
NOTE: Depending on your hardware, some of the high definition presets may be unavailable. What you see in the dropdown list are the definitions that your system supports. |
|||||||||||||||||||||
| Frame rate | The number of frames per second. The default is 30. If needed, a custom rate can be in the range 1–240. | |||||||||||||||||||||
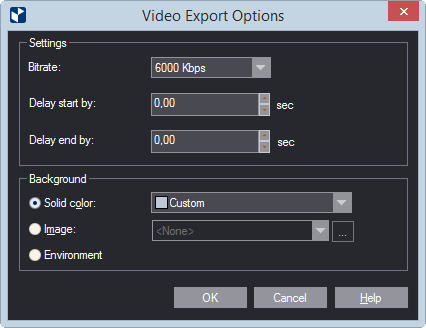
| More | Opens the Video Export Options dialog box (see below) in which you can set technical characteristics for the exported video file. | |||||||||||||||||||||

| Settings | General performance and playback settings |
|---|---|
| Bitrate | Set a bitrate. The higher the bitrate value, the better the video quality (sharpness and clarity) and the larger the video file size. |
| Delay start by | After the video starts, the first frame stays still for the amount of time you set here. |
| Delay end by | After the video ends, the last frame stays still for the amount of time you set here. |
| Background | Use a background on which the 3D model will appear in the video. |
| Solid Color | Sets a color for the background.
NOTE: If you have loaded an environment — in Environment in the Scene Lighting area the 3D model's view options — it will be reflected on the 3D model's surfaces. |
| Image | Sets an image that will serve as background. Select an
image from the dropdown list, or use the browse button to
load your own image.
NOTE: All images you load are automatically copied to the following directory: C:/ProgramData/EngView/Package Designer\SharedSettings\MaterialResources\EnvImages\BackDrop If you want to remove an image from the dropdown list, navigate to the directory and delete the file there. |
| Environment | Choosing this setting applies as background the environment loaded in Environment in the Scene Lighting area of the 3D model's view options. |