


In a print frame, you can choose which state of the folding sequence of a piece of packaging (snapshot) to be displayed in the print frame. You do this by editing the 3D model view.
To create a snapshot in a design frame
The Edit Snapshot dialog box appears.
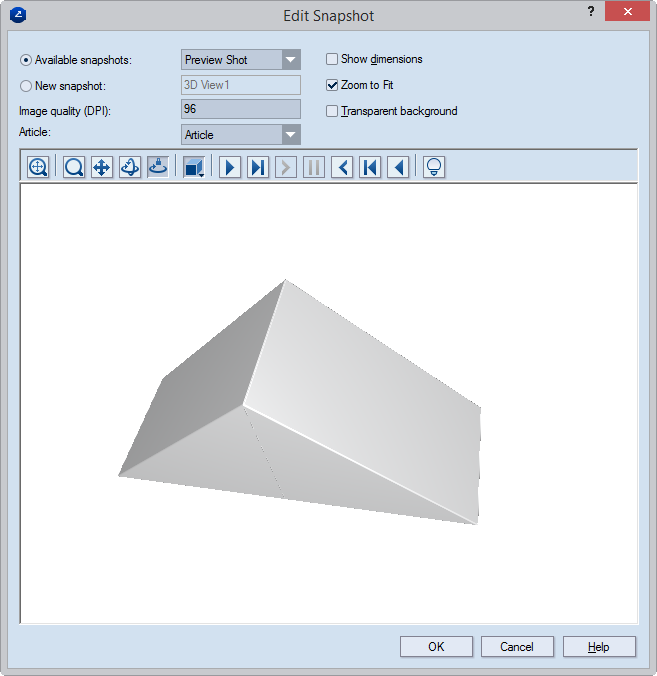
| Available snapshots | Opens a list from which you can choose a snapshot. | |
|---|---|---|
| New snapshot | To make a snapshot, type a name, and then press ENTER. | |
| Image quality (DPI) | Sets the resolution, in dots per inch, of the snapshots that you make via the New snapshot option. | |
| Article | In the drop-down list, apply an article to the structure. | |
| Show dimensions | When you click the check box, the overall dimensions for the 3D model will appear in the print drawing. NOTE: You need to have set them while preparing the 3D model. | |
| Zoom to fit | In the print drawing, makes the image fit the size of the 3D area. | |
| Transparent background | In the print drawing, makes transparent the background of the 3D area. This allows the 3D area to appear in the color set as background for the graphical area. The functionality is especially useful for white-colored 3D models: Changing the color of the drawing area background makes white-colored 3D models stand out against it. | |
| Icon | Control Name | What It Does |
|
Fit | Fits the appearance model into the preview area. |
|
Zoom | Starts zooming inside the preview area. |
|
Pan | Starts moving the surface model across the preview area. |
|
Turn | Starts rotating the surface sample within the preview area. |
|
Single Axis Rotation | Starts rotating the appearance model along the axis defined by how you move the mouse. |
| Model View | At each moment in time, you see only one of the buttons in this group. To switch to a different mode of viewing the 3D model, click the current button and drag downward, and then release the mouse buton when you reach the button you need. | |
|
Solid | (Part of the Model View group of buttons) Displays the panels of the 3D model as nontransparent. |
|
Solid With Contours | (Part of the Model View group of buttons) A viewing mode that is a combination between the Solid and Wireframe modes. Displays the model's edges in greater relief and in color. |
|
Transparent | (Part of the Model View group of buttons) Displays the panels of the 3D model as transparent and the edges in color. |
|
Wireframe | (Part of the Model View group of buttons) Hides the panels and displays the edges in color. |
|
Solid B&W | (Part of the Model View group of buttons) The panels are nontransparent with edges in black-and-white. Set how this mode appears in the global options for 3D views. |
| Phase navigation | Navigation buttons for playing back a folding sequence. That includes: playing back the folding sequence, folding a selected phase, folding the selected step, pausing, unfolding a step, unfolding a phase, reverse-playing the folding sequence. | |
|
View Options | Opens a dialog box in which you can set the lighting of the preview area. |
NOTE: By default, if you have not made a snapshot in the 3D Presenter, the program produces a default one named 3D View 1, which reproduces the Final State phase of the active 3D representation.