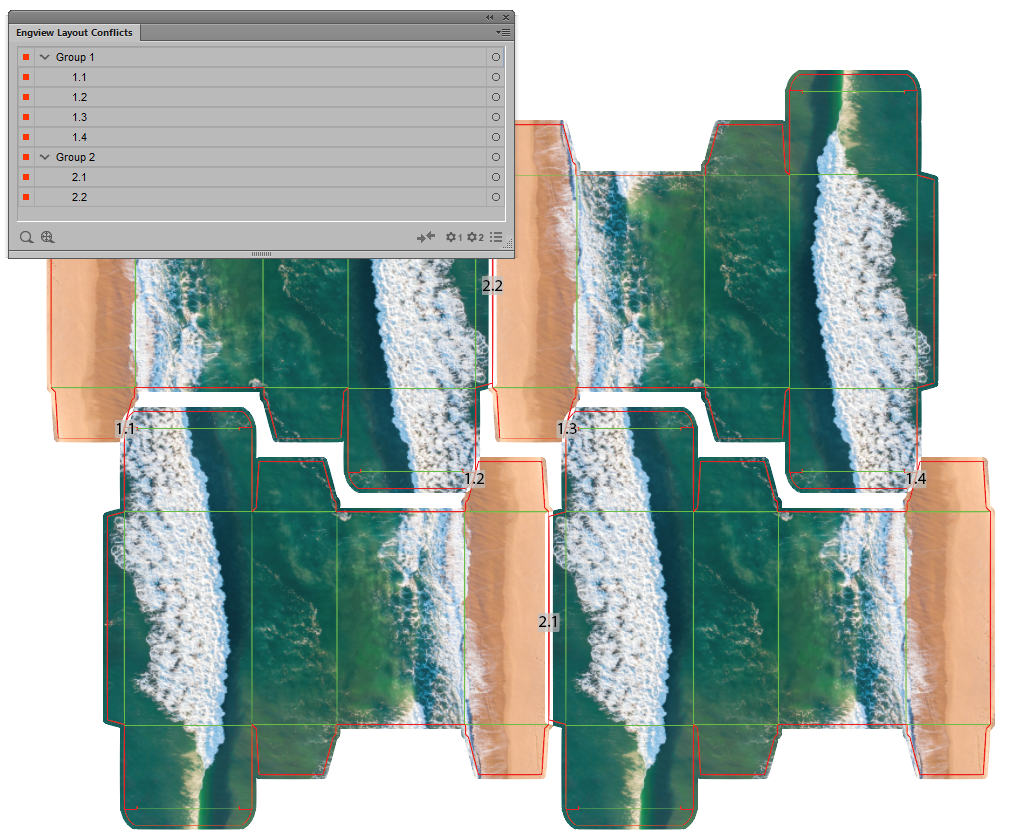
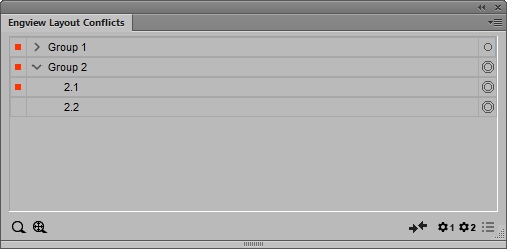
- Decide which group you want to start with, and then, in the EngView Layout Conflicts panel, click the circle across the group's name.

When you click a group's circle, the following occurs:
In the document window:
- The integration colors the labels of the conflict zones from this group. This happens because all the zones in a group are identical and can be resolved by using the same approach.
In the EngView Layout Conflicts panel:
- Outlines appear around the marking circles of all the bleed conflict zones in the list.
- The Unresolved Conflict indicator
 is pressed in. This tells you that the bleed conflicts in
the group have not yet been resolved.
 - Consider the conflict:
- The conflict is between two bleeds: Solution 1
 and Solution 2
  — become active. You will
use them to apply the bleed you need when you are resolving
conflicts where two bleeds overlap. These buttons are unavailable
when you are resolving the conflict.
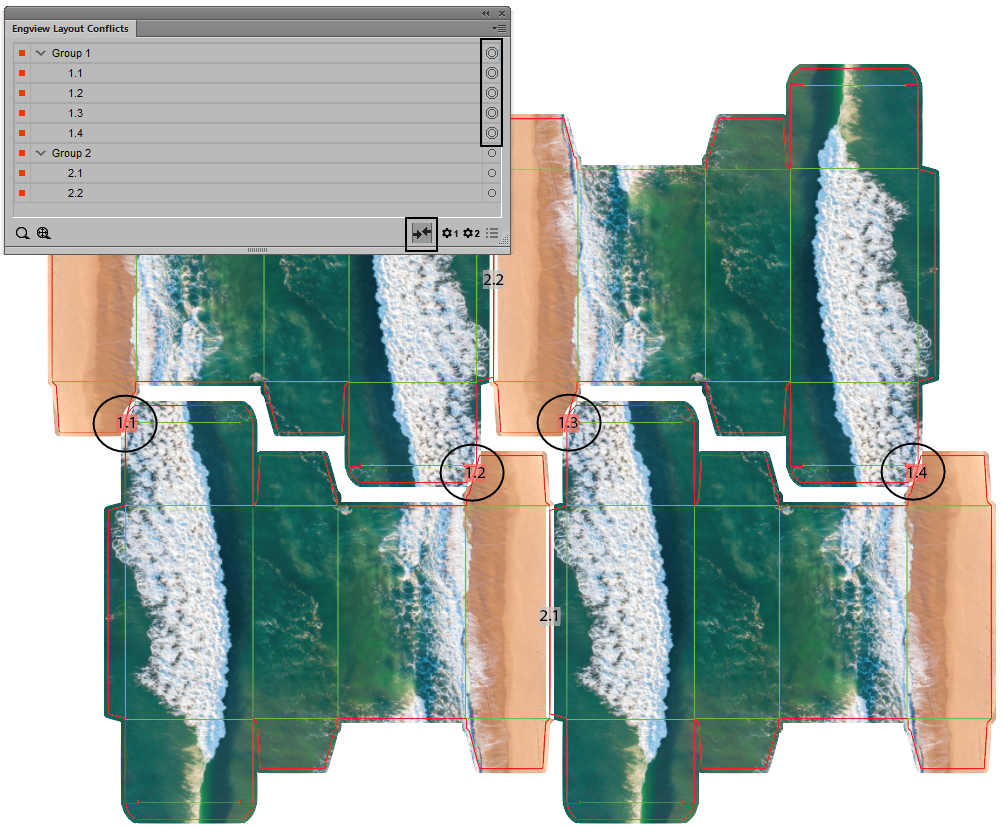
Group 1 is selected in the EngView Layout Conflicts panel and is therefore highlighted in red in document window. The conflict is still not resolved. That is why, (1) the Unresolved Conflict button is selected by default, the buttons 1 and 2 are available and (2) there are red squares at the beginning of the row.
- The conflict is between more than two bleeds: Conflict
resolution options for multiple overlapping conflict zones
 should be used.
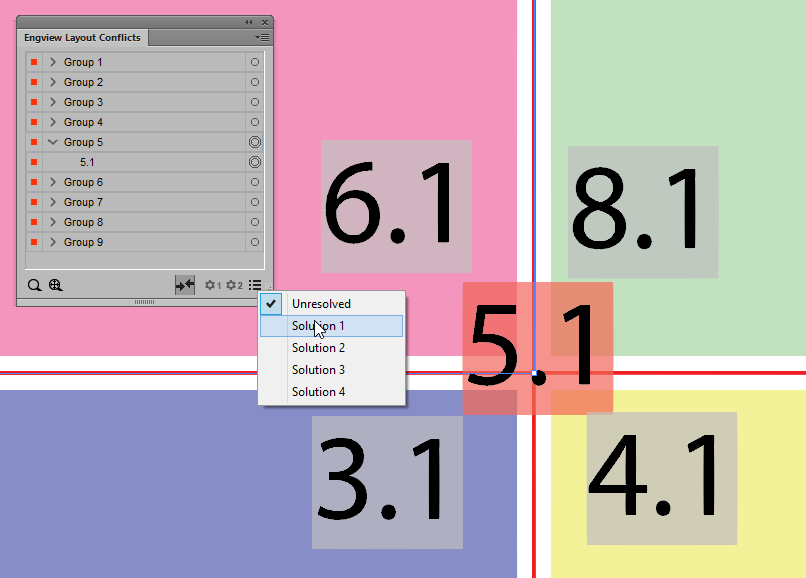
Three bleeds overlap in conflict zone 3. Group 3.1 is selected in the EngView Layout Conflicts panel and is therefore highlighted in red in document window. Because more than two bleeds are in conflict, buttons 1 and 2 are unavailable. The List of Solutions button is available, offering solutions.
- As all the zones of bleed conflict in a group are identical,
it is enough to inspect only one of them in the document window.
Click Zoom Selected
 to go to the conflict zone and inspect it (pictured).
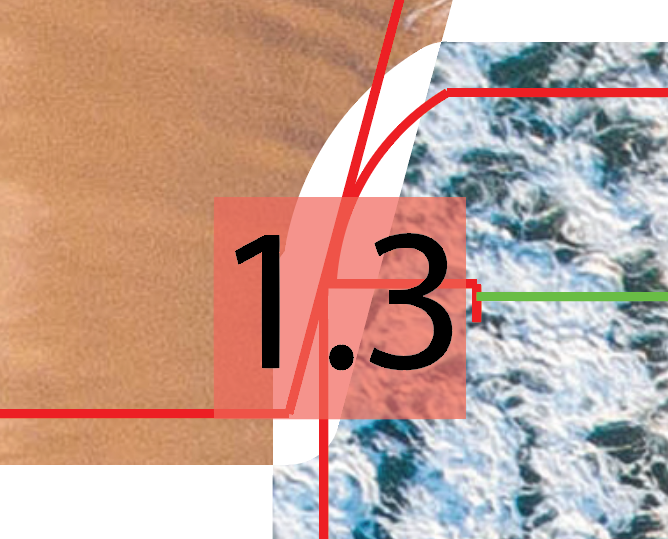
Conflict zone 1.1 marked in white, behind the numbering label, is still not resolved (the Unresolved Conflict button is available). Resolving the bleed conflict means choosing which artwork will cover the entire conflict zone area.
You have two solutions:
- The artwork of the bottom box (the tuck-end section) to cover the artwork of the top box (Solution 1).
- The artwork of the top box (the flap section) to cover the artwork of the bottom box (Solution 2).
- In the EngView Layout Conflicts panel, consider your situation:
- For zones where two bleeds overlap, toggle between
the Solution 1
 and Solution 2
  options and inspect their effects in the document window.
Then click the one that you want.
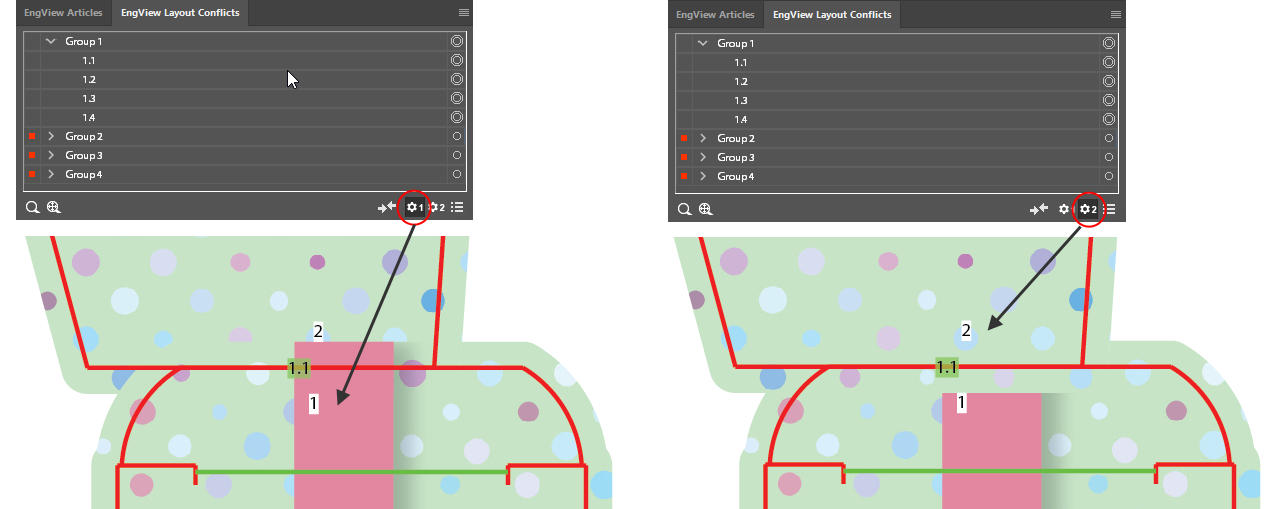
Solution 1 is on the left; Solution 2 is on the right.
 and then, in the list of solutions
that appears, click the one that resolves the conflict in the
way you want.
and then, in the list of solutions
that appears, click the one that resolves the conflict in the
way you want.After you have clicked a conflict resolution solution, the integration applies it across the group. Notice that in the EngView Layout Conflicts panel the red squares in front of the group's name and zones disappear.
TIP: After you have resolved the bleed conflict zones in a group, collapse the group to avoid any visual clutter or inadvertent clicks in the group. To collapse an open group, click the down arrow in front of the group's name.
 or Generate
Rear Layout
  as your situation requires.