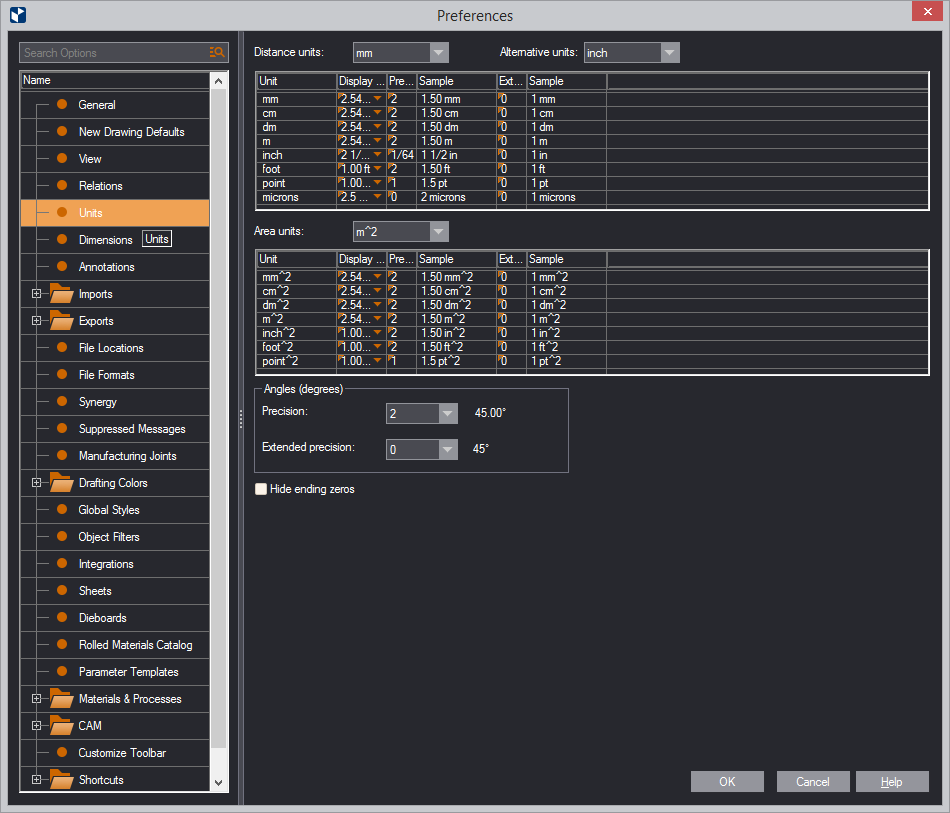
Here you set the units of measurement used during work and how their values are visualized in tables — for example, in the Layers & Objects tab — and on dimensions lines.

In Distance units, set the default working units for distances and distance dimensions — for example, line length, arc/circle radius length, the distance between parallel lines.
NOTE: Learn how EngView displays values in the selected unit. You can edit this visualization.
Alternative units. These are applicable only to dimensions measuring distances. If you want to see distance dimensions displayed in, for example, both millimeters and inches, you set millimeters as a default unit and inches as an alternative unit. In the graphical area, both units appear at dimension lines:

The use of an alternative unit is optional; you can choose not to use one at all.
IMPORTANT: For EngView to display the alternative units at dimension lines, in the Preferences | Dimensions section, select the Show Alternative Units check box.
NOTE: EngView uses what you choose here to round the actual computed value. That is, if the actual value is 23.7865423 and you have chosen the 2.54 mm format, EngView will display 23.79 mm. You can override this display format by using Extended Precision.
In Sample, you see the pattern of display as you have set it so far.
The section that follows explains Extended Precision and how to use it.
The display of values in Extended Precision lets you see values in greater precision than the one set in Display Format.
TIP: A good use of Extended Precision is if you have set Display Format to fractional display but need accuracy that fractions cannot produce. In this case, using Extended Precision display causes EngView to display the value in much greater precision.
The use of Extended Precision is optional and you can choose not to use it.
EngView displays the Extended Precision value as a decimal. This means that the number that you set in Ext. Precision indicates how many places there will be in the decimal part of the displayed value.
When you use Extended Precision, you see:
TIP: Spend some time playing with the units. In the Sample columns, you will see the effect of the values you set in Display Format and Ext. Precision.
To use Extended Precision, the following conditions must be met:
EngView uses degrees as working units for angles. You set the display precision in the Angles group.