Creating project styles
- In the tabular area, click the Styles tab.
- Right-click, and then click Edit all styles on the context
menu.
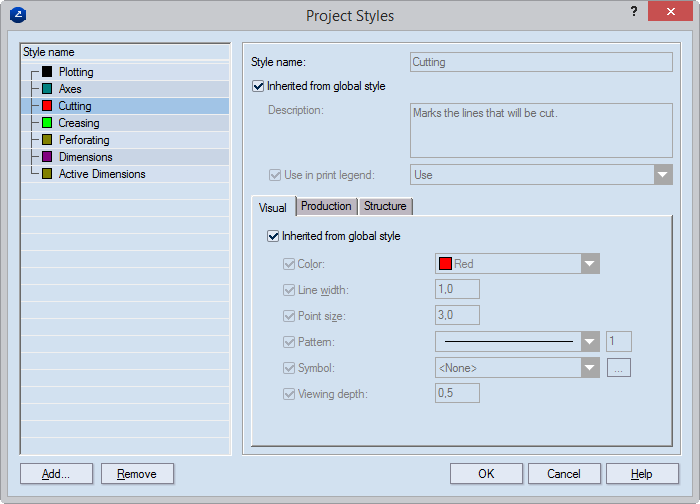
The Project Styles dialog box appears.
- Click Add.
The Browse Styles dialog box appears.
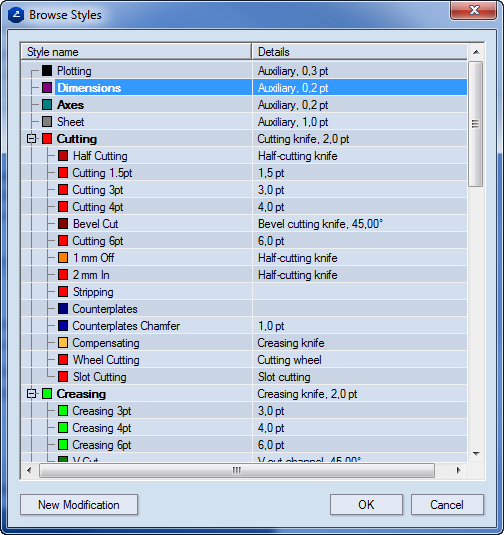
- Consider your situation:
- To use an existing style, select it, and then click OK.
- To create a style based on an existing style, select the existing
style and then click New Modification. Then, in the dialog
box that appears, type a name for the style, and then click OK.
NOTE: This procedure creates only one modification of a
selected top-level style — that is, no modifications can be based on existing
modified styles.
The newly created style/style modification appears
in the list in the Project Styles dialog box.
- In the Project Styles dialog box, select the style/style
modification you have just created.
The Project Styles dialog box appears.

- In the Visual, Production and Structure tabs,
edit the settings that you
want.
- For the new project style, enter a name and a parent style. If
you want the new style to have no parent, in the Parent style
list, select None.
- Click OK.
NOTE: When you are editing project styles, you can delete
only the styles you have created for the particular project. That is why
when in the list of the Edit Styles dialog box you select a global
style, the Delete button is unavailable.