 Search In the field, search for a specific material by typing a letter string.
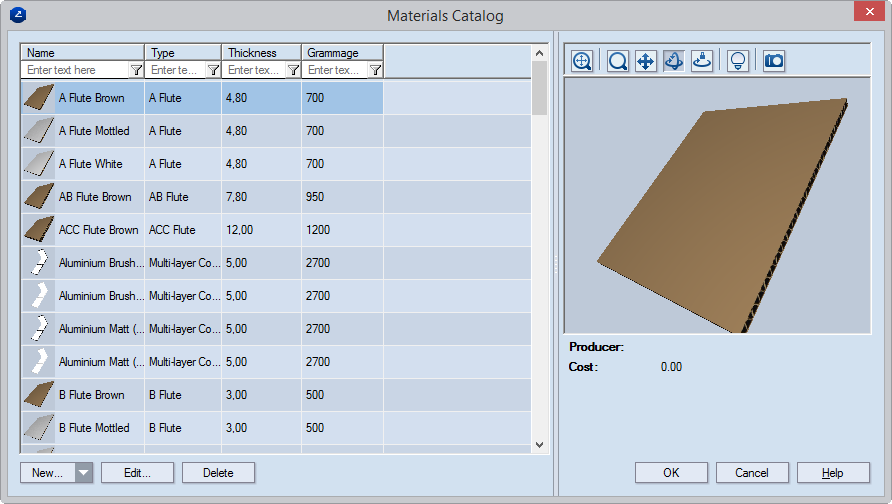
The Materials Catalog dialog box appears.

The list of materials
Name Lists the available materials.
Type Displays the type of the material.
Thickness Displays the thickness of the material.
Grammage Displays the grammage of the material (in grams per square meter).
 Search In the field, search for a specific material by typing a letter string.
The preview area
 Zoom Launches the zooming mode for the preview area.
 Fit Makes the surface sample in the preview area fit the size of the area.
 Pan Launches a mode in which you can move the surface sample across the preview area.
 Turn Launches a mode in which you can rotate the surface sample.
 Single Axis Rotation Starts the mode in which you can rotate the 3D model along a single axis, the direction being defined by the movement of the mouse.
 Set scene Sets the visualization of the surface sample in the preview area.
 Snapshot Makes a snapshot of the current state of the visualization as it is in the preview area. This snapshot then automatically appears as an icon for the surface appearance in the catalog list.
The buttons
New/Clone Opens a dialog box in which you define the properties of a surface appearance. When you clone a surface appearance, you edit an existing surface appearance and create a new one under a different name.
Edit Opens a dialog box in which you edit the properties of the selected appearance.
Delete Deletes the appearance selected in the list.
NOTE: If you need to edit an existing material, select it in the table, and then click Edit. Then, do the editing in the Edit Material dialog box.
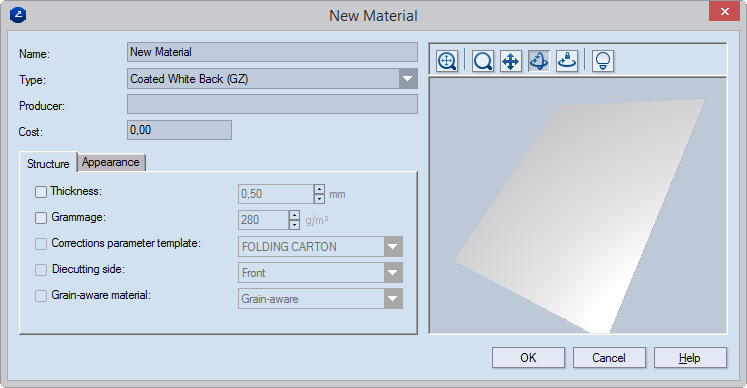
The New Material dialog box appears.
The Structure tab

Name Sets the name of the new material
Type Sets a type for the material
Producer Sets the name of the material producer
Cost Sets a cost for the material
Structure Properties that determine the structure of the material
Thickness Sets the thickness for the material
Grammage Sets the material grammage, in grams per square meter
Corrections parameters template Attaches the corrections template according to which corrections will be applied to the material.
Diecutting side Sets which side will be used as diecutting surface.
Grain-aware material Sets whether the grain of the material will be taken into account.
The preview area
 Zoom Launches the zooming mode for the preview area.
 Fit Makes the surface sample in the preview area fit the size of the area.
 Pan Launches a mode in which you can move the surface sample across the preview area.
 Turn Launches a mode in which you can rotate the surface sample.
 Set scene Sets the visualization of the surface sample in the preview area.
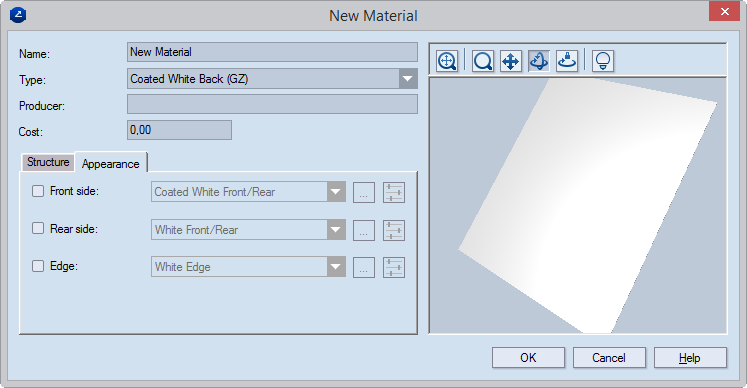
The Appearance tab

Appearance Properties of the surface appearance
Front side Sets a type for the surface appearance of the front side.
Rear side Sets a type for the surface appearance of the rear side.
Edge Sets a type for the surface appearance of the edge.
The new material is added to the catalog and appears in the list in the Material Catalog dialog box (pictured in Step 1).