Placing nicks in the bridges drawing
Placing single nicks
A single nick can be a single, double or triple nick. In placing a nick, you set the width of the nick (how long the cut in the rule will be), the position of the nick (the distance from the end of the object where the middle of the nick will be placed) and the gap of the nick (double and triple nicks only).
Placing single nicks
- In the bridge drawing, on the Diemaking tab click Place Nicks
 .
.
A contextual edit bar appears.

- Depending on the type of nick that you want to place, click Single Nick
 , Double Nick
  or Triple Nick
  .
.
- In the contextual edit bar, in Width type how wide you want the nick on the rule to be.
- In Position, type the distance from the beginning of the object at which you want to position the nick.
NOTE: For double and triple nicks, the nick is placed at the middle of the width formed by the two/three nick bars.
- (Double and triple nicks only) In Gap, type the distance between the cuts forming the double, respectively, triple nick.
NOTE: The gap is the distance between nicks' endmost points.

In the following images, observe how a single, double and triple nicks are placed onto a object.
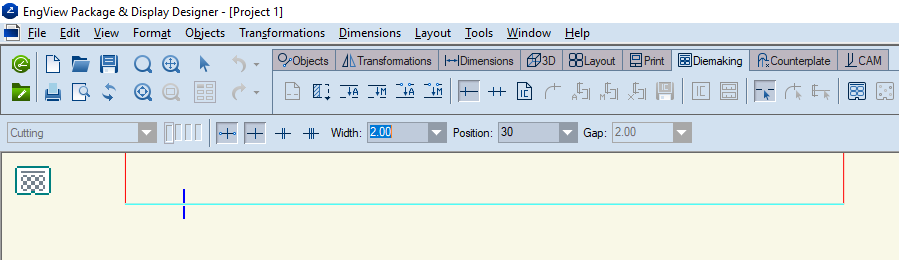
A single nick placed at 30 mm from the left end. Here, the 30 mm distance is measured from the object's end to the nick's middle point. There is no gap here.
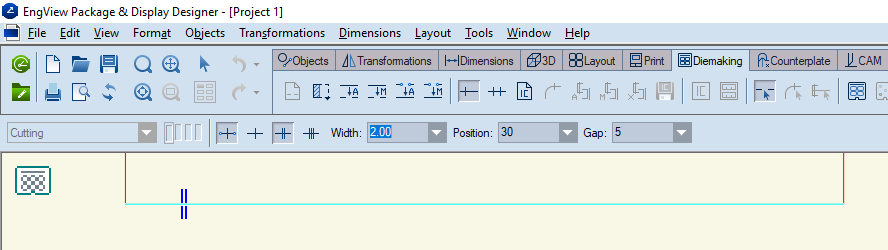
A double nick placed at 30 mm from the left end. Here, the 30 mm distance is measured from the object's end to the point that halves the two nicks' overall width. The gap is 5 mm.
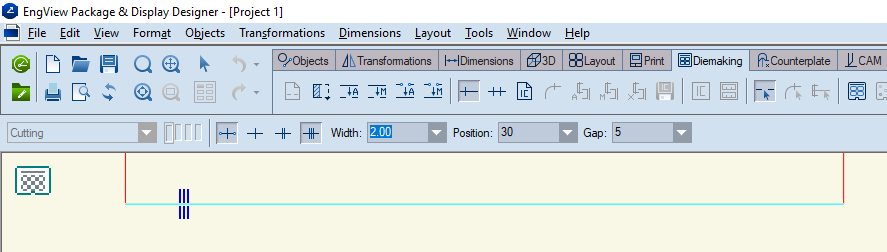
A triple nick placed at 30 mm from the left end. Here, the 30 mm distance is measured from the object's end to the middle of the middle nick. The gap is 5 mm.
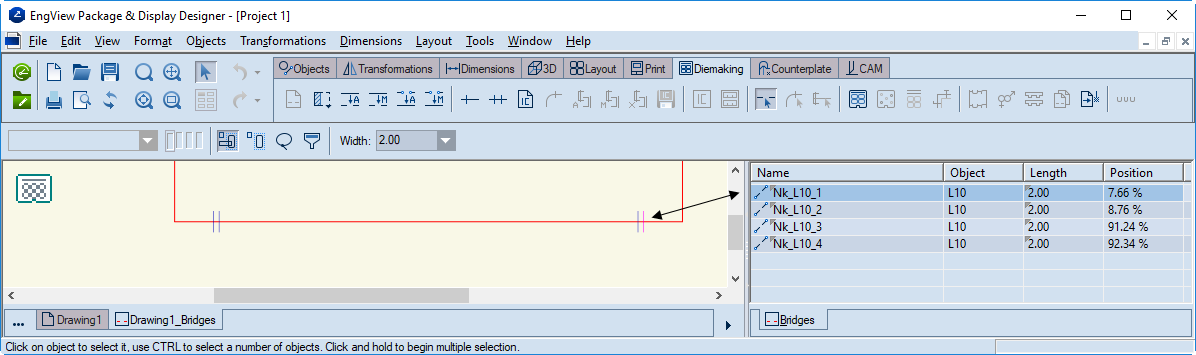
Tabular representation and selections
After you have placed a nick, a record of the nick object appears in the tabular area. For double and triple nicks (which are made up of two, respectively, three bars) each nick bar is indicated by a separate nick object record. Clicking a nick, either in the drawing or its record in the tabular area, selects the nick in both areas.
Placing multiple nicks
Placing multiple nicks means to position nicks along the cutting rule according to a preset pattern. You can choose from five patterns. See Step 3 in the procedure that follows.
To place multiple nicks
- In the bridge drawing, on the Diemaking toolbar, click Place Multiple Nicks
 .
.
A contextual edit bar appears.

- In the drop-down list, select the pattern that you want the program to place nicks along the object.
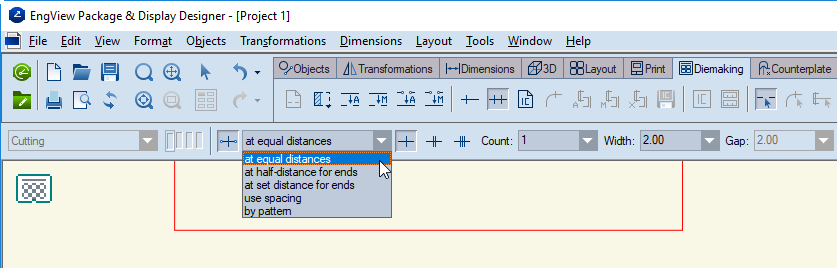
- Select the placing pattern you want.
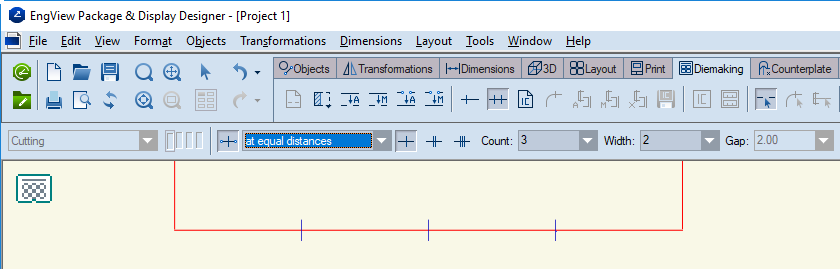
- Аt equal distances. You set (1) Select the type of nicks you want to place (single, double or triple). Then (2) set how many nicks you want placed (Count) and (3) how wide they are to be (Width), and (4) in Gap, a gap between the notches (for double or triple nicks). In the image below, see three 2-mm-wide nicks placed at equal distances along the object.
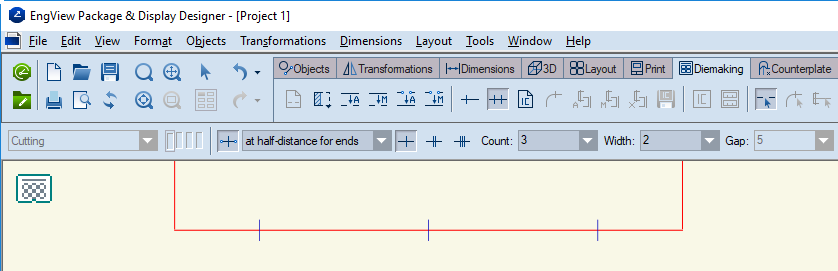
- At half-distance for ends. You set (1) Select the type of nicks you want to place (single, double or triple), (2) how many nicks you want placed (Count), (2) how wide you want the cuts to be (Width), (3) the gap between them (Gap) (for double and triple nicks). In the image below, see three single nicks placed with the end ones positioned at a distance from the ends that's one-half that between the nicks in the middle. There is no gap here.
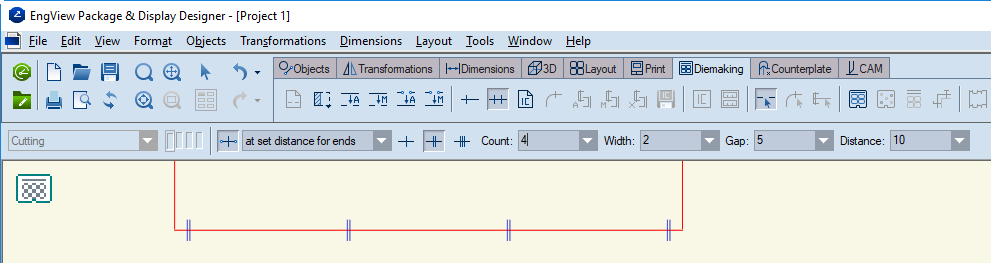
- At set distance for ends. You set (1) Select the type of nicks you want to place (single, double or triple), (2) how many nicks you want placed (Count), (3) how wide you want the cuts to be (Width) (4) the gap between them (Gap) (for double or triple nicks), and (5) the distance from the ends of the object (Distance). In the image below, you see four double nicks placed along an object, with the end ones placed at 10 mm from the left and right ends of the object. The gap is 5 mm.
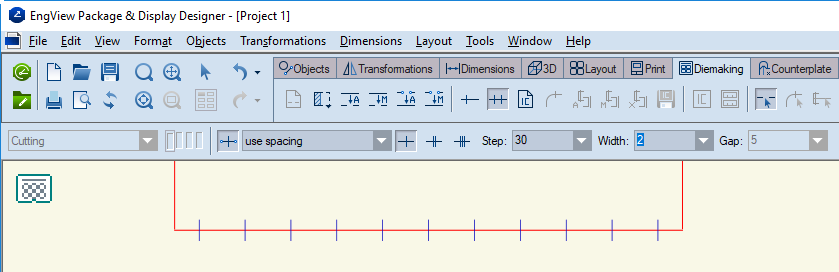
- With a spacing between the nicks. You set (1) Select the type of nicks you want to place (single, double or triple), (2) the distance between the nicks (Step) and (3) how wide you want the cuts to be (Width) and (4) the gap between them (Gap) (for double or triple nicks). In the image below, you see single nicks placed along the object, each one at a distance of 30 mm from the next. There is no gap here.
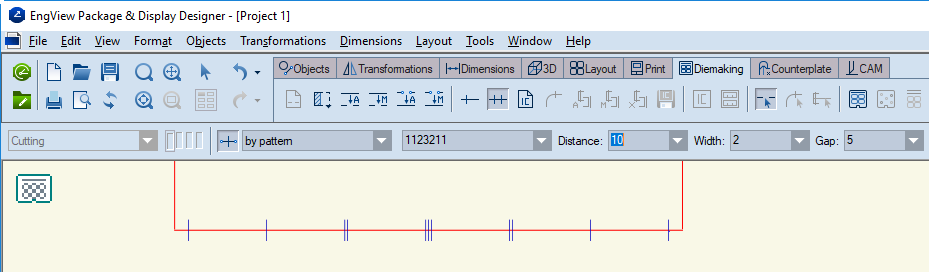
- By applying your own pattern. You type (1) the pattern for the placement of nicks, (2) the distance from the ends of the object (Distance), (3) set how wide you want the cuts to be (Width), and then (4) the gap between them (Gap) (for double or triple nicks). In the image below, you see single, double and triple nicks placed along the object in the 1-1-2-3-2-1-1 pattern. For the double and triple nicks, the gap is 5 mm.