The Object Properties dialog box appears in the Hatch tab.

Line Sets a fill that consists of lines slanting in one direction. (To set the angle at which the lines slant and the distance between them, see the Parameters area.)
Parameters Settings for the angle at which the lines slant and the distance between them.
Angle The angle of the slanting lines against the x-axis.
Step The distance between the parallel slanting lines.
Preview Displays what the fill looks like.
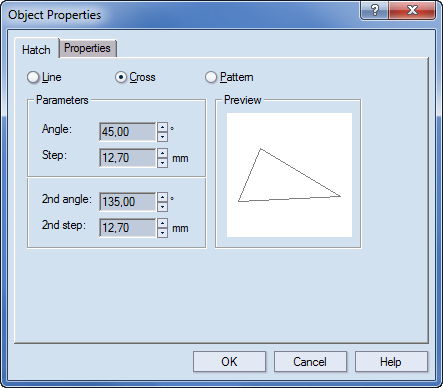
Cross Sets a fill that consists of pattern of crossing lines. (To set the angles at which the lines slant and the distances between them, see the Parameters area.)
Parameters Settings for the angles at which the lines slant and the distances between them.
Angle Sets the angle of the first slanting line against the x-axis.
Step Sets the distance between the parallel slanting lines.
2nd angle Sets the angle of the second (crossing) slanting line against the x-axis.
2nd step Sets the distance between the second (crossing) parallel slanting lines.
Preview Displays what the fill looks like.
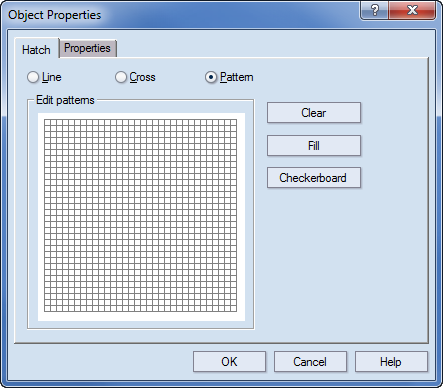
Pattern Sets a custom pattern fill. (To set the custom pattern, begin painting in the Edit patterns area.)
Edit patterns In this area, the custom pattern is painted by clicking the squares. Each click results in a filled square.
Clear Makes blank all the cells in the square.
Fill Fills all the cells in the square — the result is a plain-color fill.
Checkerboard Applies a checkerboard pattern to the cells in the square.
NOTE: See details about the Properties tab.