Adding vector text
Vector text strings can be cut, creased, and so on in CAM samplemaking and in diemaking.
The contextual edit bars
When the Vector Text mode is activated.

 For help on snapping, see Snapping objects.
 Starts the Detect Relations Manager.
Attributes
- Content. The actual text. Appears in the first edit box in the contextual edit bar during entering and when the text is selected.
- Length. Appears in the Length column in the tabular area.
- Height. The height of the vector text, measured in the current metric units (mm, inch, and so on).
- Italic Font Option. Appears as a button in the contextual edit bar.
- Style. For details about style, see Formatting styles, colors and templates.
- Id. A unique, system-generated object identification number. Appears in the Id column in the .
Control points
A vector text string has one control point, located at its lower left-hand side. When you insert the text string in the graphical area, this is the place where you click to place the text.

Tabular presentation
When you insert a vector text string, its object type, Id number, the overall length of the constructional objects of the letters, and the text style in the Objects tab in the tabular area.
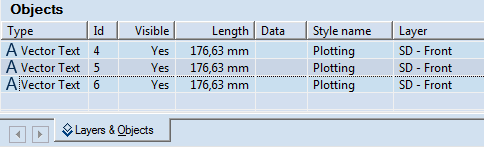
NOTE: The data in the Objects tab is unavailable for direct editing.
To add vector text to a drawing
- Do any of the following:
- On the , click Vector Text
 .
.
- On the Objects menu, point to Texts, and then click Vector Text.
- Press CTRL+D+V+T.
- In the contextual edit bar, in the text edit box, enter the text that you want.
- In the contextual edit bar, in H, set the height of the text.
- (Optional) To italicize the text, click Italic Text
 .
.
- (Optional) Snap the control point of the text that you are about to place, to another object or point.
- In the graphical area, click where you want the text string to be — the point you click is the control point of the text.
- (Optional) To insert more vector text strings, repeat Steps 2–6.
- To cancel the insertion of text, press ESC.
To modify a vector text string
- Select the text.
- In the contextual edit bar, edit the text content, height and font style, and then press ENTER.
To reposition a vector text string by dragging
- Select the text.
- Drag the text to the desired location, or directly enter in the contextual edit bar the Dx and Dy offset distances relative to the original location of the text.
- Click again to place the text in its new location.