 .
.Before applying a printing or finishing effect to an object, you must create a process layer to carry the effect. After you have created the layer, you can proceed by assigning objects in the design to the process layer. An exception are the processes backing and lamination, which are applied onto the entire design and need no specific objects.
IMPORTANT: Processes are executed in the descending order in which they appear in the Layers section — that is, the top listed layer is executed first; the bottom layer last. To rearrange the order of layers, right-click a layer, and then click Move Up/Move Down as your case requires.
NOTE: If the Layers & Objects tab is unavailable, right-click any of the available tabs, and then check Layers & Objects on the context menu.
.The New Layer dialog box appears.
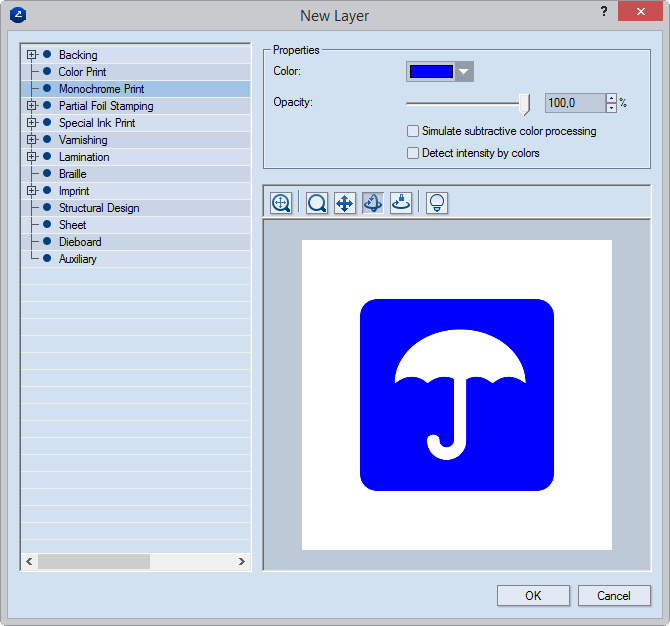
Properties Context-specific settings for the surface process at hand. The default settings are:
Backing Opacity; in Colored cold foil Opacity and color
Color Print, Special Ink Print, Varnishing, Lamination, Braille Opacity
Monochrome print Opacity and color
Partial foil stamping (Colored Foil) Color
Imprint Opacity and bump height
NOTE ON OPACITY: Colors appear differently depending on whether they are printed onto corrugated or carton board. To give guidance for how colors will appear when printed on different materials, the program can simulate light absorption. To use this simulated light absorption, select the Simulate subtractive color processing check box.
 Fit Fits the design
to the preview area.
Fit Fits the design
to the preview area.
 Zoom Enables zooming
into the preview area.
Zoom Enables zooming
into the preview area.
 Pan Enables moving the design
around the preview area.
Pan Enables moving the design
around the preview area.
 Turn Enables the rotation
of the design around the preview area.
Turn Enables the rotation
of the design around the preview area.
 Single axis rotation Starts the mode in which you can rotate the
3D model along a single axis, the direction being defined by the movement
of the mouse.
Single axis rotation Starts the mode in which you can rotate the
3D model along a single axis, the direction being defined by the movement
of the mouse.
 Scene settings Opens
a dialog box in which you can set the visuals of the preview area.
Scene settings Opens
a dialog box in which you can set the visuals of the preview area.
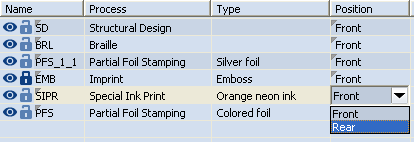
TIP: You can change the position of a process layer directly in the tabular area while working on the design.
NOTE: You can duplicate (clone) layers. This is used mostly when a version of a process needs to be applied to the same objects.
The Clone Layer dialog box appears. It is identical with the Create Layer dialog box.