Applying a layout template to new sheet
You can use an already created layout template to a new sheet.
To apply a layout template to a new sheet
- Open a layout drawing created by automatic layout.
- Do any of the following:
- On the Layout toolbar, click Apply Layout Template to New Sheet
 .
.
- On the Layout menu, click Apply Layout Template.
- Press CTRL+L+A.
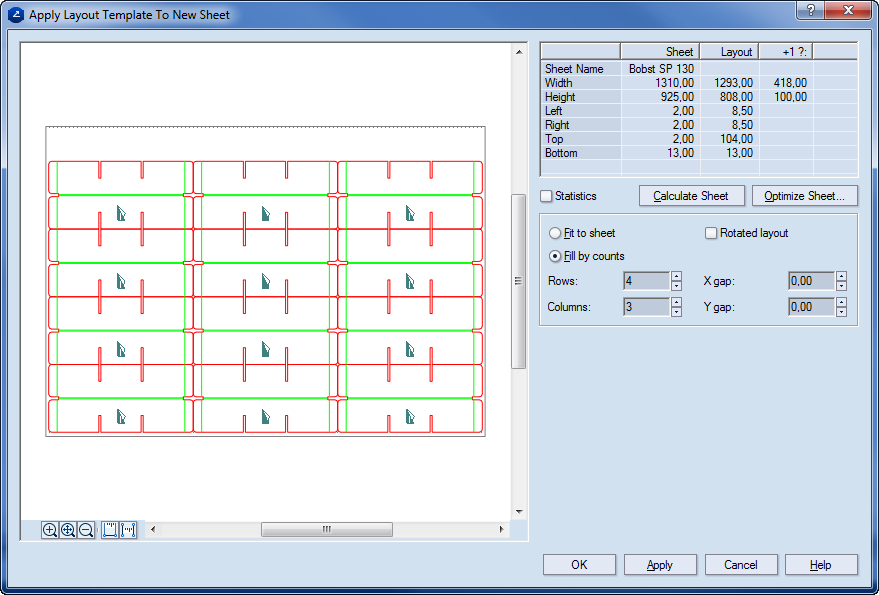
The Apply Layout Template to New Sheet dialog box appears.

- Select a sheet. Consider the following situations:
- If you want to use an pre-defined sheet, in the table, in Sheet Name, in the Sheet column select a new sheet.
- If you want to set your own sheet size, select User-defined, and then:
-
- In Width, correct the sheet width.
- In Height, correct the sheet height.
- In Bottom, Left, Top and Right, correct the sheet margins.
NOTE: If you select a pre-defined sheet and then change its properties, the selected sheet is revoked and User-defined appears in the Sheet column.
- (Optional) To see reference data, such as, among others, the number of placed parts, the total area, the used area and the waste area percentage, click Statistics.
- (Optional) To calculate and apply a custom sheet size for the current layout, click Calc Sheet.
NOTE: If you have selected a sheet and then use the custom sheet calculation, the selected sheet is revoked and User-defined will appear in the Sheet column.
- (Optional) To apply sheet optimization, click Opt. Sheet.
- Adjust the sheet. Consider the following situations:
- To make the applied template fit the selected sheet, click Fit to sheet. The number of rows and columns which can fit into the sheet are calculated automatically.
-
NOTE: If the sheet is too small for the number of rows and columns set in Rows and Columns, the extra rows or columns are trimmed. Conversely, if the sheet can take in more rows and/or columns than are specified, such are added into the layout until the sheet is filled.
- To make the applied template contain a specific number of columns and rows, click Fill by counts. X gap and Y gap set, respectively, the horizontal and vertical distances of the rows and the columns.
-
NOTE: The arrows to the right of X Gap and Y Gap change the respective values by a default step of 10.00 metric units. To change the step, click the small rectangular button next to the arrows, and then in the Edit Step dialog box that appears, enter a new step.
 .
. .
.