

The panel lists the artworks in the project.

An EngView drawing is displayed as a layer in the Layers panel. The project is shown in one main layer with sublayers — one for each the dimensions and for each of the drawings (1ups) in the project.
Each drawing has its own artboard in Illustrator's work area. In the Layers panel, the number that's in front of the drawing's name corresponds to the number of the artboard.
 top of page
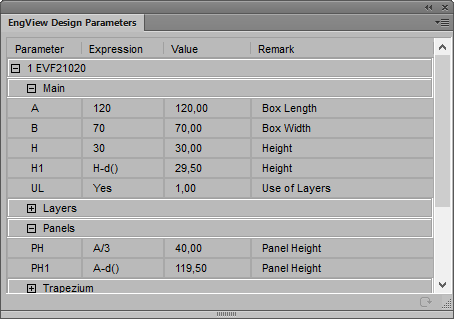
This panel lists the parameters of the design that is active in the canvas area. You can edit the parameter expressions by clicking into the boxes and then clicking the Recalculate button. The integration then computes the design and resizes the drawing.
| Icon | Name | What It Does |
|---|---|---|
|
Recalculate | When you have made changes to a parameter expression and click the button, the drawing is recalculated and the 3D model is refreshed. |
|
Edit in Package Designer | Opens the project in EngView, where you can make structural changes to the design, and also create or delete parameters. |
The EngView Processes panel displays the elements in the project that carry finishing effects. These can be based on an EngView drawing, an Illustrator layer, or a spot color.
| Colors / Layers / EV Drawings | Displays the layer name — colors, AI layers, or EngView drawings. | |
|---|---|---|
| Process | Displays the name of the process. Context-relevant selection of processes is allowed, depending on the layer selected in the Colors/Layers/EV Drawings column. | |
| Type | Displays the process type. Context-relevant selection of processes is allowed, depending on the layer selected in the Process column. | |
| Icon | Name | What It Does |
 |
New process | Creates a new process. It appears as a record in the list. |
 |
Remove | Deletes a selected process. |
 |
Move up | Moves a selected layer up the list. |
 |
Move down | Moves a selected layer down the list. |
The EngView Articles panel displays the articles created in the project and is the place where articles are created and where artworks are assigned to articles.

| Article | The name of the article | |
|---|---|---|
| Front | The name of the artwork for the front side of the structure | |
| Rear | The name of the artwork for the rear side of the structure. | |
| In Use | Indicates how many times the part on which the article is applied is used in project. For example, if you are working with a display that has six shelves, the In Use column will display 6. | |
| Icon | Name | What It Does |
| |
Add New Article | Click to add a new article to the list. Then proceed with assigning artworks for its front and rear sides. |
| |
Remove Article | Click to delete an article. Deleting an article does not delete the artworks assigned to it. |
The 3D panel displays a 3D model of the project as defined in EngView. In Illustrator, you can load articles to the structure, navigate around a 3D model, set its appearance, set material for the design, and export the 3D representation to a different file format.
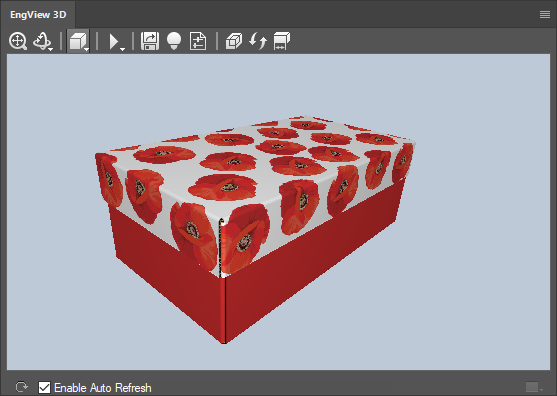
| Enable Auto Refresh | When the check box is selected, changes in the canvas area are immediately reflected in the 3D view. NOTE: When the graphical design is too large, this functionality slows down the work of the 3D window. For smoother work, it is better to leave the check box empty and refresh the 3D view by clicking the Refresh button. | |
|---|---|---|
| |
Refresh | Updates the 3D view according to changes in the canvas area. |
| Icon | Name | What It Does |
 |
Fit | Makes the 3D model fit the current size of the preview area |
 |
Turn | Launches the mode in which you can rotate the 3D model across the preview area. |
 |
Pan | (shares a button with Turn) Launches the mode in which you can move the 3D model horizontally across the preview area. |
 |
Wireframe | Presents the design by showing only the edges and not the panels. |
 |
Transparent | (shares a button with Wireframe) Presents the panels of the 3D model as transparent. |
 |
Solid | (shares a button with Wireframe) Presents the panels of the 3D model as nontransparent. |
 |
Phase navigation | Opens a bar with navigation buttons for playing back a folding sequence of the 3D model. |
| Upload to Shared Space | Opens a dialog box in which you set the upload of the 3D model to Shared Space. You can then invite collaborators to view the model. | |
 |
Export 3D | Opens a dialog box in which you can set the options for exporting a 3D model file. |
 |
Scene settings | Opens a dialog box in which you can set the visual properties of the 3D scene. For details, see the View Options section below. |
 |
Drawing material properties | Opens a dialog box in which you can manage the properties of the material selected for the design. |
 |
Make Replication | Spreads an image across different planes. |
 |
Update Replication | Refreshes the spreading of an image across different planes when its position was changed. |
 |
Show Dimensions | Shows measurement lines of the 3D model if these are available in the project. |
| Icon | Name | What It Does |
|
Edit in Package Designer | Opens the current drawing in EngView making it available for further editing. |
| Cut Selected | When you have made a selection in an artboard, EngView copies it into the EVDrawing layer (it carries the structural design), applying the Cutting style to it. This is automatically reflected as a hole in the 3D representation. | |
| Crease Selected | When you have made a selection in an artboard, EngView copies it into the EVDrawing layer (it carries the structural design), applying the Creasing style to it. This is automatically reflected as an edge in the 3D representation. | |
| Copy Selected | When you have made a selection, EngView copies it into the EVDrawing layer. No style is applied. Is not reflected in the 3D representation. TIP: To use these objects for changing the structural design, click Edit in Package Designer, and then, in EngView , do the changes you need — for example, trimming, rounding, offsetting — and apply the styles that you need. | |
 |
Select Article | In the 3D model, switches to the respective article. |
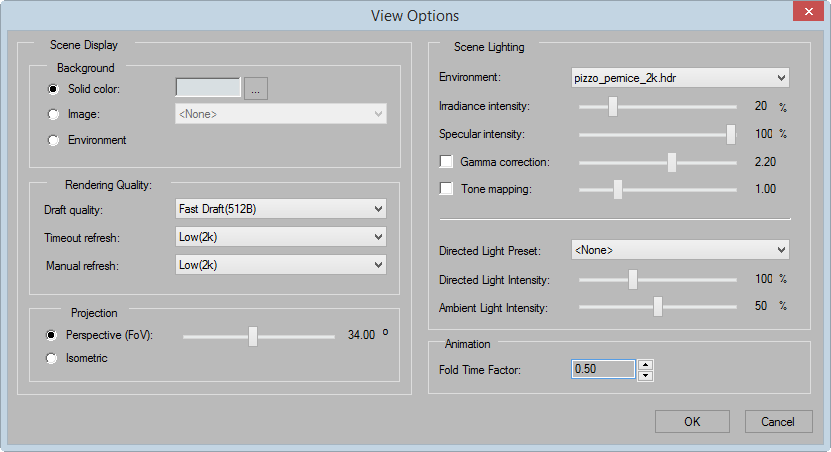
See detailed descriptions of the controls in this dialog box. Additional controls are as follows:
| Rendering Quality | The controls in this group set how precise the integration
renders graphics in the preview area. There are three states of
rendering:
|
|---|---|
| Draft quality | This is the normally blurry view that you see right after making a change to a graphic in the canvas area. It lasts 5 seconds, whereupon the Timeout refresh rendering quality kicks in, giving you a more fine-grained view. |
| Timeout refresh | Here you set the quality of view that the integration gives you after 5 seconds have passed since your last change to the graphic. From the dropdown list, select the quality that works for you. NOTE: The integration will not refresh the 3D respresentation if the Enable auto refresh check box is empty. |
| Manual refresh | Here you set the quality of view that the integration applies
each time you refresh it using the Refresh button .
If you want to set a value higher than the one in Timeout refresh,
select the value that works for you from the dropdown list. NOTE:
The default value is 2k, which you can increase to up to 4k. You
can further increase it to up to 16k, provided your video adapter
has the respective capability. To do this:
|
In this panel, you apply techniques for resolving overlapping graphics in print-ready layout files.
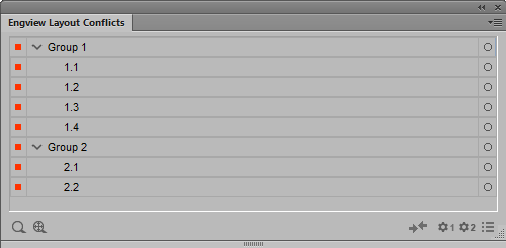
Group An individual group lists all identical conflict zones.
 Zoom
Selected When a conflict zone is selected, focuses on the zone
in the document window.
Zoom
Selected When a conflict zone is selected, focuses on the zone
in the document window.
 Zoom
to fit Updates the focus to fit the available document window.
Zoom
to fit Updates the focus to fit the available document window.
 Unresolved Selected
when none of the conflict zones in a group have been resolved.
Unresolved Selected
when none of the conflict zones in a group have been resolved.
 Resolution
1/2 The two conflict resolution techniques that you can choose
from for resolving a conflict zone.
Resolution
1/2 The two conflict resolution techniques that you can choose
from for resolving a conflict zone.
 Opens a list of the available
resolutions in conflict zones with multiple overlaps.
Opens a list of the available
resolutions in conflict zones with multiple overlaps.
Learn how to create a production-ready file from a layout.
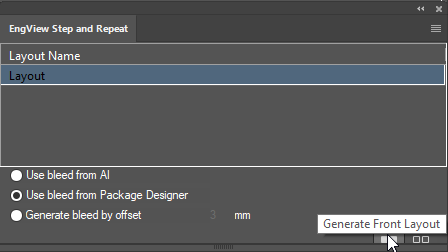
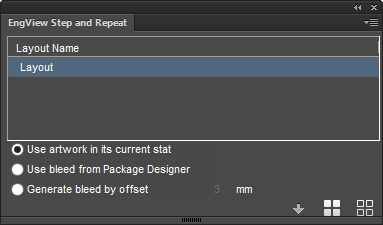
Use artwork in its current state Use bleed that you create in Illustrator. If you have added the bleed using Illustrator, the integration will use it for printing the file.
Use bleed from Package Designer Use the bleed that you create in the 1up in Package Designer.
Generate bleed by offset Generate bleed in Illustrator by setting a specific offset. You add manually an offset value for the bleed that the integration will later apply for generating the print-ready files.
 Import PDFs Textures (Used in Integration Solutions) Uses PDFs in external resources to apply artworks created for dedicated artboards.
 Generate Front Layout Using the layout drawing, generates print-ready layout for the front side.
 Generate Rear Layout Using the layout drawing, generates print-ready layout for the rear side.
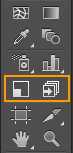
You can find the exporting and scaling tools on Illustrator's Tools panel.
| Icon | Name | What It Does |
|---|---|---|
 |
EngView Scale Tool | Scales an image that is about to be applied to an artboard to fit the pre-scaled-down artboard drawings. The situation arises when you are working on a structure whose artboards have been scaled down to fit the canvas size of Illustrator and you then begin applying an image to any of them. To use the tool, select the image, and click the button. Illustrator (1) detects the scaling ratio of the artboards and (2) scales the image down accordingly. |
 |
EngView Export Tools | Clicking this button offers three functionalities:
|
 Open artboard as separate
document Opens the artboard selected in the canvas in
a
Open artboard as separate
document Opens the artboard selected in the canvas in
a  Export all artboards
as PDFs
Export all artboards
as PDFs  Export selected artboard
as PDF Exports the artboard selected in the canvas in
a separate PDF file.
Export selected artboard
as PDF Exports the artboard selected in the canvas in
a separate PDF file.